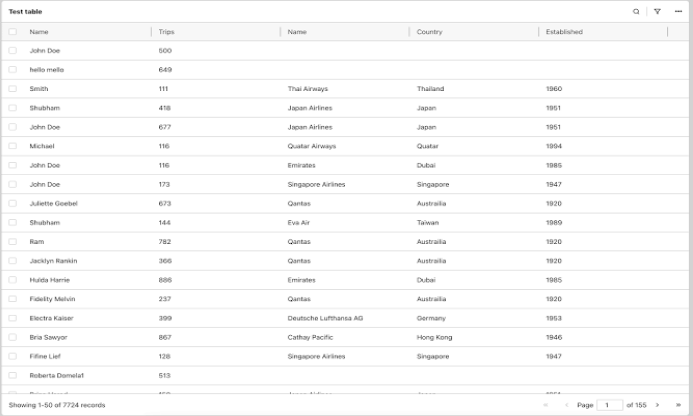
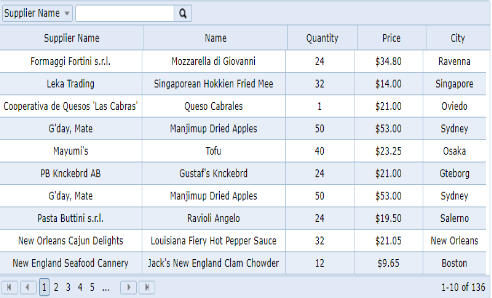
React Table is a powerful and flexible library that allows developers to create dynamic and interactive tables in their React applications with ease. In this tutorial, we will explore how to set up a project with React Table, and specifically dive into the useTable and useFilter hooks, which are essential for creating and filtering data in a table.
Project Setup
Before we start using React Table, we need to set up a new React project. Here’s a step-by-step guide on how to do that:
Step 1: Install Node.js and npm (Node Package Manager) on your computer if you haven’t already. You can download and install Node.js from the official Node.js website (https://nodejs.org/).

Step 2: Open your terminal or command prompt and run the following command to create a new React project using Create React App, a popular tool for bootstrapping React applications:
npx create-react-app react-table-tutorial
This will create a new React project with the name “react-table-tutorial” in a directory of the same name.

Step 3: Navigate to the newly created project directory by running the following command:
cd react-table-tutorial

Step 4: Install the necessary dependencies for React Table. In this tutorial, we will use the following packages:

npm install react-table@latest react-table-6@lates
These packages provide the core functionality of React Table, as well as some additional features like sorting, filtering, and pagination.
Now that we have our project set up, we can start using React Table to create dynamic tables in our React application.
useTable HookLike
A useTable hook is a powerful tool that allows us to create tables with various functionalities. It provides a way to define columns, access data, and perform actions on the table data.

Let’s start by importing the necessary modules from React Table and setting up a basic table using the useTable hook.
import React from “react”;
import { useTable } from “react-table”;
const Table = ({ columns, data }) => {
const {
getTableProps,
getTableBodyProps,
headerGroups,
rows,
prepareRow
} = useTable({ columns, data });
return (
<table {…getTableProps()}>
<thead>
{headerGroups.map(headerGroup => (
<tr {…headerGroup.getHeaderGroupProps()}>
{headerGroup.headers.map(column => (
<th {…column.getHeaderProps()}>{column.render(“Header”)}</th>
))}
</tr>
))}
</thead>
<tbody {…getTableBodyProps()}>
{rows.map(row => {
prepareRow(row);
return (
<tr {…row.getRowProps()}>
{row.cells.map(cell => (
<td {…cell.getCellProps()}>{cell.render(“Cell”)}</td>
))}
</tr>
);
})}
</tbody>
</table>
);
};
export default Table;
In the code above, we define a functional component called Table that takes in two props: columns and data. The columns prop defines the structure of the table, including column headers and their properties, while the data prop contains the actual data to be displayed in the table.
Inside the component, we use the useTable hook from React Table to get various props and methods that allow us to set up and customize the table. We destructure the necessary props from the hook, such as getTableProps, getTableBodyProps, headerGroups, rows, and prepareRow.
We then use these props to render the table HTML structure, including the table header and table body. We loop through th
the headerGroups and headers to render the column headers, and loop through the rows to render the table rows. We use the prepareRow method to prepare each row for rendering.
Now let’s see how we can use the useFilter hook to add filtering functionality to our table.
useFilter Hook
The useFilter hook in React Table allows us to easily add filtering capabilities to our table. It provides a way to define filters on specific columns and apply them to the table data.

Let’s update our Table component to include filtering using the useFilter hook.
import React from “react”;
import { useTable, useFilters } from “react-table”;
const Table = ({ columns, data }) => {
const {
getTableProps,
getTableBodyProps,
headerGroups,
rows,
prepareRow,
state,
setGlobalFilter
} = useTable(
{
columns,
data,
initialState: {
globalFilter: “” // initial global filter value
}
},
useFilters // useFilters hook for filtering
);
const { globalFilter } = state;
return (
<div>
<input
type=”text”
value={globalFilter}
onChange={e => setGlobalFilter(e.target.value)}
placeholder=”Search…” // add a search input for global filtering
/>
<table {…getTableProps()}>
<thead>
{headerGroups.map(headerGroup => (
<tr {…headerGroup.getHeaderGroupProps()}>
{headerGroup.headers.map(column => (
<th {…column.getHeaderProps()}>{column.render(“Header”)}</th>
))}
</tr>
))}
</thead>
<tbody {…getTableBodyProps()}>
{rows.map(row => {
prepareRow(row);
return (
<tr {…row.getRowProps()}>
{row.cells.map(cell => (
<td {…cell.getCellProps()}>{cell.render(“Cell”)}</td>
))}
</tr>
);
})}
</tbody>
</table>
</div>
);
};
export default Table;
In the code above, we updated the useTable hook to include the useFilters hook as the second argument. This enables filtering functionality in our table. We also added an input element for global filtering, which allows users to search for specific data in the entire table.
We use the state object from the hook to access the current value of the global filter, and the setGlobalFilter method to update the filter value based on user input.
With the useFilter hook, we can easily add column-specific filters as well. Let’s see how we can do that.
import React from “react”;
import { useTable, useFilters, useGlobalFilter } from “react-table”;
const Table = ({ columns, data }) => {
const {
getTableProps,
getTableBodyProps,
headerGroups,
rows,
prepareRow,
state,
setGlobalFilter
} = useTable(
{
columns,
data,
initialState: {
globalFilter: “” // initial global filter value
}
},
useFilters, // useFilters hook for column-specific filters
useGlobalFilter // useGlobalFilter hook for global filtering
);
const { globalFilter } = state;
return (
<div>
<input
type=”text”
value={globalFilter}
onChange={e => setGlobalFilter(e.target.value)}
placeholder=”Search…” // add a search input for global filtering
/>
<table {…getTableProps()}>
<thead>
{headerGroups.map(headerGroup => (
<tr {…headerGroup.getHeaderGroupProps()}>
{ headerGroup.headers.map(column => )
<th {…column.getHeaderProps()}>
{column.render(“Header”)}
<input
type=”text”
value={column.filterValue || “”}
onChange={e => column.setFilter(e.target.value)}
placeholder=”Filter…” // add a filter input for each column
/>
</th>
))}
</tr>
))}
</thead>
<tbody {…getTableBodyProps()}>
{rows.map(row => {
prepareRow(row);
return (
<tr {…row.getRowProps()}>
{row.cells.map(cell => (
<td {…cell.getCellProps()}>{cell.render(“Cell”)}</td>
))}
</tr>
);
})}
</tbody>
</table>
</div>
);
};
export default Table;
In the code above, we added an input element for each column header, along with an onChange event handler that calls the setFilter method provided by the column object from the headerProps. This allows users to enter values in the filter input for each column and filter the table data based on those values.
Conclusion
In this tutorial, we learned how to set up a basic table using React Table, and how to use the useTable and useFilter hooks to add filtering functionality to our table. We covered how to use the useTable hook to define columns, data, and rendering logic for our table, and how to use the useFilter hook to add column-specific and global filters. We also saw how to update the filter values and apply filters to the table data based on user input.
React Table is a powerful and flexible library for creating tables in React applications. With its easy-to-use hooks and customizable options, it provides a convenient way to create complex and interactive tables with various functionalities. We hope this tutorial helped understand the basics of setting up and using React Table with filters, and you can now leverage this knowledge to create your table with filtering capabilities in your React projects.


Add comment