Introduction
Slack is a communication application used by developers and businesses to exchange and convey information. It has been increasingly popular in recent years.
We’ll go over how to create and deploy a bot that can communicate with the Slack workplace and channels. We’ll look at how to make slash commands and graphic requests- like buttons. The bot application will deliver queries to a Go backend through Websocket, also known as Socket-Mode in the Slack community.
We will mainly focus on setting up and creating a bot that can interact with Slack channels and workspace. The guide is mainly divided into two sections:
- Slack Set Up
- Golang Setup and Installation
By using Golang to develop Slack Bot.
Part 1: Create Slack Workspace
- Go to slack and click Create a Workspace.


- Add the necessary information, a team or company name, a channel name, and invite other colleagues who may communicate with the bot.
Part 2: Creating Slack Application
- To create a Slack application open the slack website and choose From scratch option.
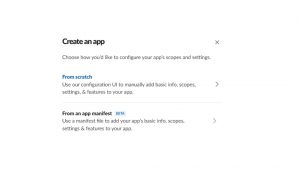
- Add a name for an application that Workspace will enable for future usage.
- Make a bot with the application.
- Choose Bots, this will redirect you to the Help Page.
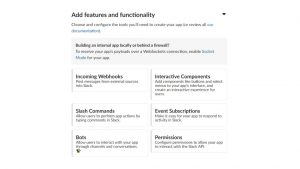
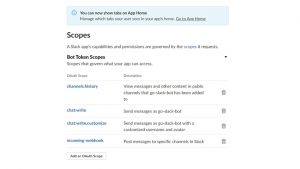
- Click on Add Scopes. Now add permissions to the application.

- Click on Review Scopes to Add and enter four major scopes that will allow the bot to interact with the application.
- Install the application; if you are not the owner, you must get permission from an administrator.

The next step is to choose a channel where the bot may post as an application.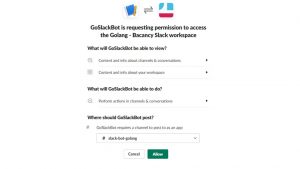
- Click Allow to obtain the OAuth token and Webhook URL needed for the authentication procedure.
- Invite the app to a channel. The name slack-bot-golang.
Now, type a command message starting with this /.; now we can invite the bot by typing /invite @NameOfYourbot.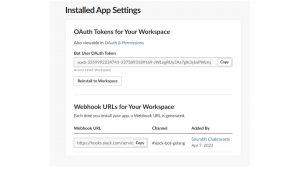

Part 3: Basic Golang Set-Up and Installation
- Create a new directory to which we will attach all future code, configure connection with the Slack channel, and write code using the authentication token.
- We use the godotenv package to read environment variables and the go-slack package to handle the normal REST API, WebSockets, RTM, and Events.
Part 4: Develop Slack Bot using Golang
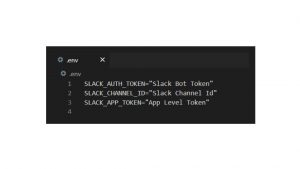
- Make a .env file to record your Slack credentials, including the channel ID.
- Locate the Token in the web UI where the app was created.
- By clicking on the channel’s dropdown arrow, navigate to Get channel data.
From here you need to start the coding
- Begin by connecting to the workspace and sending a short message to ensure that everything is in working order. Create the main. Go.
- Create a slack attachment. A message will be included that we send to the channel and add some fields to send extra contextual data; It is entirely up to us whether or not to include this information.
// main.go
package main
import (
“fmt”
“os”
“time”
“github.com/joho/godotenv”
“github.com/slack-go/slack”
)
func main() {
godotenv.Load(“.env”)
token := os.Getenv(“SLACK_AUTH_TOKEN”)
channelID := os.Getenv(“SLACK_CHANNEL_ID”)
client := slack.New(token, slack.OptionDebug(true))
attachment := slack.Attachment{
Pretext: “Super Bot Message”,
Text: “some text”,
Color: “4af030”,
Fields: []slack.AttachmentField{
{
Title: “Date”,
Value: time.Now().String(),
},
},
}
_, timestamp, err := client.PostMessage(
channelID,
slack.MsgOptionAttachments(attachment),
)
if err != nil {
panic(err)
}
fmt.Printf(“Message sent at %s”, timestamp)
}
To run the software, use the following command. There is a new message in the slack channel.
go run main.go
Slack Events API Call
Now, utilize the slack events API to manage events in Slack conversations. Our bot solely listens to mentioned events; if somebody mentions the bot, it will be activated. WebSocket is used to convey these events.
- Activate the socket mode section which allows the bot to connect via Websocket.
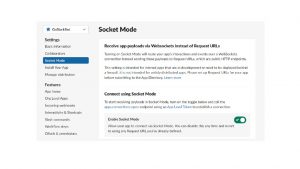
- Add Event Subscriptions. To activate, locate it on the Features tab and toggle the button.
- The app mention scope should then be added to event subscriptions. This will cause the indicated new event to be triggered in the application
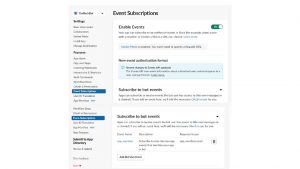
The Final step is to generate an application token.
To generate application follow the below steps:
- Go to Settings->Basic Information
- Scroll down to the section App-Level Tokens
- Click on Generate Tokens and Scope Now give a name to the app token.
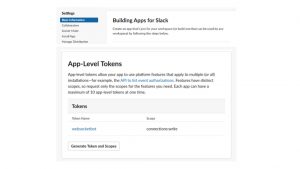
- We need to add the following connections to the app: Write scope to that token, then save it by adding it to the .env file as SLACK_APP_TOKEN.
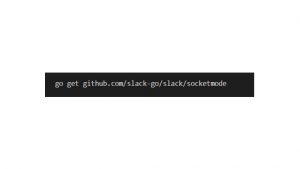
- To utilize Socket Mode, install the socketmode slack-go subpackage.
Now for the socket mode, create a new client. We have two clients, one for standard API events and one for WebSocket events.
Call socketmode to connect the WebSocket client. Create a new ordinary client and pass it as input, along with OptionAppLevelToken, which is now required to connect to the Socket.
Lastly, we refer to this as socketClient. Run() will block and process new WebSocket messages on the socketClient channel. Events. We Include a for loop to check for new events on a continual basis, as well as a type switch to handle different events. To listen for new events, we attach a go-routine that will handle incoming messages in the background. This causes an event to be triggered on the EventAPI in Slack.
package main
import (
“context”
“fmt”
“log”
“os”
“time”
“github.com/joho/godotenv”
“github.com/slack-go/slack”
“github.com/slack-go/slack/slackevents”
“github.com/slack-go/slack/socketmode”
)
func main() {
godotenv.Load(“.env”)
token := os.Getenv(“SLACK_AUTH_TOKEN”)
appToken := os.Getenv(“SLACK_APP_TOKEN”)
client := slack.New(token, slack.OptionDebug(true), slack.OptionAppLevelToken(appToken))
socketClient := socketmode.New(
client,
socketmode.OptionDebug(true),
socketmode.OptionLog(log.New(os.Stdout, “socketmode: “, log.Lshortfile|log.LstdFlags)),
)
ctx, cancel := context.WithCancel(context.Background())
defer cancel()
go func(ctx context.Context, client *slack.Client, socketClient *socketmode.Client) {
for {
select {
case <-ctx.Done():
log.Println(“Shutting down socketmode listener”)
return
case event := <-socketClient.Events:
switch event.Type {
case socketmode.EventTypeEventsAPI:
eventsAPI, ok := event.Data.(slackevents.EventsAPIEvent)
if !ok {
log.Printf(“Could not typecast the event to the EventsAPI: %v\n”, event)
continue
}
socketClient.Ack(*event.Request)
log.Println(eventsAPI)
}
}
}
}(ctx, client, socketClient)
socketClient.Run()
}
Run the software and access the Slack app or online, then mention bot by using
@yourbotname.
go run main.go
The event should be logged in the command line that is running the bot. The event we get is of the type event callback, and it has a payload containing the actual event that occurred.
Following that, begin implementing the HandleEventMessage, which will continue the type swapping. The type field can be used to determine how to handle the Event. Then, using the InnerEvent property, we can get to the payload event.
func HandleEventMessage(event slackevents.EventsAPIEvent, client *slack.Client) error {
switch event.Type {
case slackevents.CallbackEvent:
innerEvent := event.InnerEvent
switch evnt := innerEvent.Data.(type) {
err := HandleAppMentionEventToBot(evnt, client)
if err != nil {
return err
}
}
default:
return errors.New(“unsupported event type”)
}
return nil
}
Replace the previous log with the new one in the main function that prints the event.
HandleEventMessage function.
log.Println(eventsAPI)
replace with
err := HandleEventMessage(eventsAPI, client)
if err != nil {
log.Fatal(err)
}
The bot must react to the user who mentioned it.
Begin by login into the application and assigning the users:read scope to the bot token, as we did previously. We’ll write the HandleAppMentionEventToBot function once we’ve added the scope to the token. This function will accept a slack and a *slackevents.AppMentionEvent. Client is used as input so that it can react. The user ID is included in the event.
We can get user information by using this user. During the event, the channel reaction is also available. Channel. The data we want is the actual message provided by the user while mentioning, which we can obtain via the event.
func HandleAppMentionEventToBot(event *slackevents.AppMentionEvent, client *slack.Client) error {
user, err := client.GetUserInfo(event.User)
if err != nil {
return err
}
text := strings.ToLower(event.Text)
attachment := slack.Attachment{}
if strings.Contains(text, “hello”) || strings.Contains(text, “hi”) {
attachment.Text = fmt.Sprintf(“Hello %s”, user.Name)
attachment.Color = “#4af030”
} else if strings.Contains(text, “weather”) {
attachment.Text = fmt.Sprintf(“Weather is sunny today. %s”, user.Name)
attachment.Color = “#4af030”
} else {
attachment.Text = fmt.Sprintf(“I am good. How are you %s?”, user.Name)
attachment.Color = “#4af030”
}
_, _, err = client.PostMessage(event.Channel, slack.MsgOptionAttachments(attachment))
if err != nil {
return fmt.Errorf(“failed to post message: %w”, err)
}
return nil
}
Now restart the software and say hello or hello and anything else to test whether it works as it should. If you receive a “missing scope” error, you have overlooked some scope.
Run the Application
Here is the output of the currently running bot
To see the source code, please clone the repository and install the project on your PC. You may experiment with the sample application and learn more about it.
The github repository is available here: slack-bot-using-golang-example
Conclusion
We hope this blog ‘How to Develop Slack Bot Using Golang’ fulfilled its purpose. This is a basic step-by-step guide for constructing a slack bot with the go-slack package.



Add comment