In the ever-evolving landscape of web development, full-stack developers play a crucial role in building dynamic and feature-rich applications. One common task that often falls within their purview is integrating third-party APIs. These APIs act as bridges to external services and data, empowering developers to extend their applications’ capabilities without reinventing the wheel. In this blog, we will explore the world of third-party API integration, from understanding the fundamentals to implementing a few examples.
What Are Third-Party APIs?
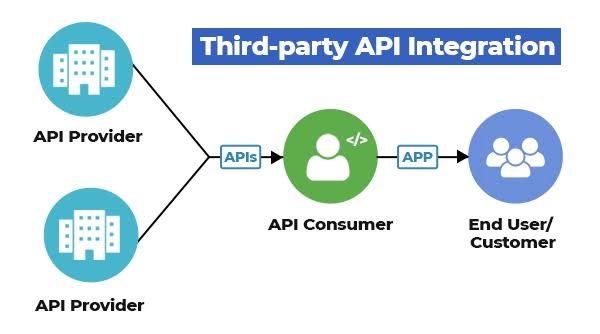
An API, or Application Programming Interface, is essentially a set of rules and protocols that allow one piece of software to interact with another. In the context of web development, APIs act as intermediaries that enable different software systems to communicate. Third-party APIs are developed and maintained by external organizations or individuals. These APIs grant access to services and data provided by third parties, offering developers a wide array of functionalities to incorporate into their applications.
Benefits of Using Third-Party API
Integrating third-party APIs into your applications offers several significant benefits.
Time and Cost Savings
Building certain features and functionalities from scratch can be time-consuming and costly. Third-party APIs provide pre-built solutions that can be quickly integrated, saving development time and resources.
Enhanced Functionality
Third-party APIs can supercharge your applications by providing access to services and data that would be challenging or impossible to create on your own. Whether it’s geolocation services, social media integration, or payment processing, these APIs extend your application’s capabilities.
API Authentication
As we now understand the importance of third-party APIs, let us get into the first technical aspect: API authentication. Authentication is the process of verifying the identity of the requester. For security reasons, most third-party APIs require some form of authentication before they grant access.
Common Authentication Methods
There are several authentication methods commonly used with APIs.
API Keys
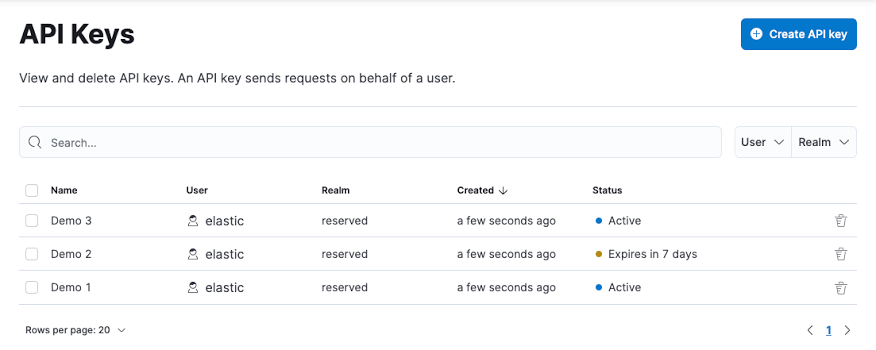
API keys are unique tokens provided by the API provider. These keys are included in API requests to identify the application and grant access. While they are simple to use, API keys can be less secure if not handled properly.
Here’s an example of how you might include an API key in an HTTP request using Python and the popular requests library.
python
import requests
api_key = “your_api_key_here”
url = “https://api.example.com/data”
response = requests.get(url, headers={“Authorization”: f”Bearer {api_key}”})
# Handle the API response here
OAuth

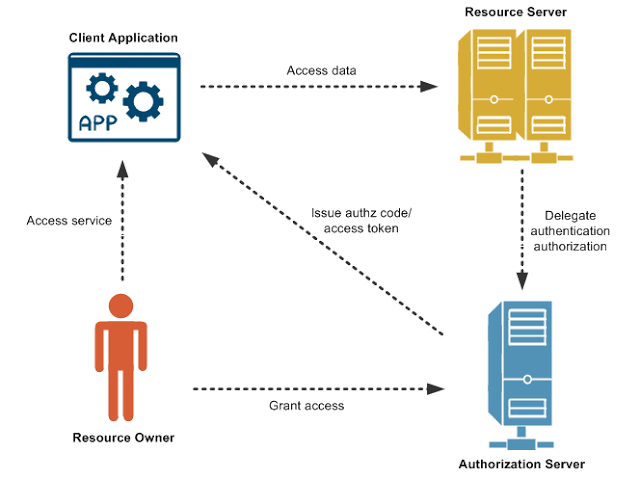
OAuth (Open Authorization) is a more complex but secure authentication method often used by social media platforms and other web services. It involves obtaining access tokens that represent the user’s authorization to access their data on a third-party service.
To implement OAuth, you will typically need to follow a series of steps, including redirecting users to the service’s authentication page, obtaining an access token, and using that token to make authenticated requests.
The specific implementation of OAuth can vary greatly depending on the service you are integrating. Popular libraries and frameworks often provide tools to streamline the OAuth process, so you do not have to build it from scratch.
javascript
// Example OAuth flow in JavaScript using a library like Passport.js
const passport = require(‘passport’);
const TwitterStrategy = require(‘passport-twitter’).Strategy;
// Configure the Twitter OAuth strategy
passport.use(new TwitterStrategy({
consumerKey: ‘your_consumer_key’,
consumerSecret: ‘your_consumer_secret’,
callbackURL: ‘your_callback_url’
},
(token, tokenSecret, profile, done) => {
// Handle user authentication here
}
));
Making API Requests
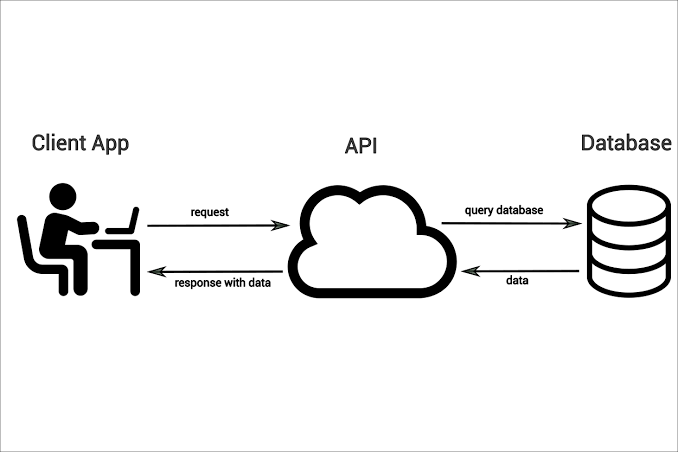
Now that you understand the basics of API authentication, it’s time to explore how to make requests to third-party APIs. The HTTP protocol plays a central role in this process, as it serves as the foundation for communication between your application and the API.
HTTP Methods
HTTP supports several methods for making requests, but the most commonly used ones in API integration are:
GET: Used to retrieve data from the API. It’s ideal for fetching information without making any changes on the server.
POST: Used for sending data to the API, often to create new resources or update existing ones.
PUT: Similar to POST but typically used for updating existing resources, and it should be idempotent, meaning repeated requests produce the same result as a single request.
DELETE: As the name suggests, this method is used to delete resources on the server.
Constructing API Requests
To make an API request, you’ll typically use a programming language-specific library or module that simplifies the process. One popular choice is Axios for JavaScript, or the built-in requests library in Python.
Here’s a simplified example of making a GET request to retrieve data from a hypothetical API:
javascript
const axios = require(‘axios’);
const apiUrl = ‘https://api.example.com/data’;
axios.get(apiUrl)
.then((response) => {
// Handle the API response here
console.log(response.data);
})
.catch((error) => {
// Handle any errors that occur during the request
console.error(error);
});
In this example, we use Axios to send a GET request to the API endpoint, and we handle the response and potential errors accordingly.
Handling API Responses
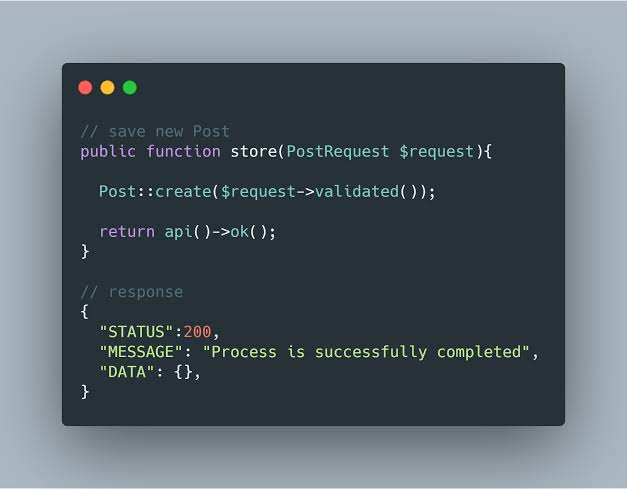
API responses are typically structured data, often in formats like JSON or XML. After making a request, you need to extract and work with the relevant data from the response.
JSON Response Handling
JSON (JavaScript Object Notation) is a widely used format for structuring data in API responses. In JavaScript, parsing JSON is straightforward.
javascript
const jsonResponse = ‘{“name”: “John”, “age”: 30}’;
const data = JSON.parse(jsonResponse);
console.log(data.name); // Output: John
console.log(data.age); // Output: 30
Error Handling
While working with APIs, it’s essential to handle errors gracefully. APIs can return various HTTP status codes to indicate the outcome of a request. For example, a 404 status code signifies that the requested resource was not found, while a 500 status code indicates a server error.
javascript
axios.get(apiUrl)
.then((response) => {
// Handle a successful response
console.log(response.data);
})
.catch((error) => {
// Handle errors based on the HTTP status code
if (error.response) {
console.error(`Status Code: ${error.response.status}`);
console.error(`Error Data: ${error.response.data}`);
} else if (error.request) {
console.error(‘No response received’);
} else {
console.error(‘Error:’, error.message);
}
});
This code example demonstrates error handling using Axios in JavaScript. It checks for different error scenarios, such as a successful response, a network-related error, or an error in the response data.
Frontend Integration: Displaying Weather Data
To illustrate frontend integration with a third-party API, let us consider a scenario where you want to display real-time weather data in your web application. We will use a weather example for this.
Step 1: API Authentication
First, you need to sign up for an API key from a weather service provider, which will be used for authentication. These keys are usually free for limited usage and can be obtained by registering on the provider’s website.
Step 2: Making API Requests
Once you have your API key, you can start making requests to the weather API. In this example, we’ll use the OpenWeatherMap API, which provides weather data based on location.
Here is a simplified HTML and JavaScript code to fetch and display weather data on your webpage
html
<!DOCTYPE html>
<html>
<head>
<title>Weather App</title>
</head>
<body>
<h1>Current Weather</h1>
<div id=”weather-info”>
<p>Loading weather data…</p>
</div>
<script>
// Replace ‘your_api_key_here’ with your actual API key
const apiKey = ‘your_api_key_here’;
const apiUrl = `https://api.openweathermap.org/data/2.5/weather?q=London&appid=${apiKey}`;
fetch(apiUrl)
.then(response => response.json())
.then(data => {
// Handle the weather data
const weatherInfo = document.getElementById(‘weather-info’);
weatherInfo.innerHTML = `
<p>Location: ${data.name}</p>
<p>Temperature: ${data.main.temp}°C</p>
<p>Weather: ${data.weather[0].description}</p>
`;
})
.catch(error => {
// Handle errors
console.error(error);
const weatherInfo = document.getElementById(‘weather-info’);
weatherInfo.innerHTML = ‘<p>Error fetching weather data</p>’;
});
</script>
</body>
</html>
In this code, we start by defining the API endpoint with your API key. Then, we use the fetch function to make an HTTP GET request to the OpenWeatherMap API. Upon receiving the JSON response, we extract and display relevant weather information on the webpage.
This example showcases how easily you can integrate a third-party API into your frontend application to provide real-time data to your users. Similar approaches can be used with various APIs to add functionalities like maps, social media feeds, or data visualizations to your web applications.
Backend Integration: Integrating a Payment Gateway
Moving on to backend integration, let’s explore a more complex scenario: integrating a payment gateway into your application. Payment gateways allow you to securely process payments for products or services, and they often require robust backend integration to handle transactions.
Step 1: API Authentication
For this example, we will consider integrating with the Stripe payment gateway, which offers a developer-friendly API for processing payments. Start by signing up for a Stripe account and obtaining your API keys, including a secret key for server-side authentication.
Step 2: Making API Requests
Stripe provides libraries for various programming languages to facilitate integration. Here’s a simplified example using Node.js and the stripe library.
javascript
const stripe = require(‘stripe’)(‘your_secret_key_here’);
// Create a new payment intent
stripe.paymentIntents.create({
amount: 2000, // Amount in cents (e.g., $20.00)
currency: ‘usd’,
description: ‘Example payment’,
payment_method_types: [‘card’],
})
.then(intent => {
// Handle the payment intent
console.log(‘Payment Intent:’, intent);
})
.catch(error => {
// Handle errors
console.error(‘Error:’, error);
});
In this Node.js example, we use the stripe library to create a payment intent for a hypothetical payment. The library handles the communication with the Stripe API, including authentication and error handling. This example demonstrates how we can initiate a payment process on the backend.
Error Handling and Debugging
As you work with third-party APIs, it’s crucial to implement robust error handling and debugging mechanisms. APIs can be unpredictable, and errors can occur for various reasons, including network issues, rate limiting, or incorrect request parameters.
Conclusion
Integrating third-party APIs into your applications is a powerful way to enhance functionality, provide real-time data, and streamline processes. Whether you are building a frontend-heavy web app or a robust backend system, understanding how to work with third-party APIs is an essential skill for full-stack developers.
In this blog, we understood what third-party API integration is. We looked into API authentication, making requests, and handling responses. We have also provided real-world frontend integration with weather data and backend integration with payment processing.
As you continue your journey as a full-stack developer, remember that API integration is a dynamic and evolving field. Stay up-to-date with the latest APIs, tools, and best practices to build cutting-edge applications that leverage the power of third-party services.


Add comment