Allure Report is the utility that processes test results collected by a compatible test framework and produces an HTML report. Allure Report is indeed a powerful open-source tool designed to generate clear and concise test execution reports. It provides a detailed and visually appealing representation of test results, making it easier for teams to understand the test outcomes and identify issues.
Cypress is a popular JavaScript testing framework that is known for its ease of use and fast execution speed.Integration of Allure with Cypress can be used to generate comprehensive and visually appealing reports of the test cases. Allure reports include detailed information about each test case, including its status, duration, steps, and screenshots.
About Allure Report?
Allure is an open-source framework designed for creating interactive and comprehensive test reports. It is commonly used in software testing to generate detailed and visually appealing reports for test execution results.
Allure provides a clear and concise way to represent test outcomes, making it easier for both technical and non-technical stakeholders to understand the test results.Allure reports allows everyone participating in the development process to extract maximum useful information from everyday execution of tests.
Why Allure Reports?
An open-source framework designed to create test execution reports that are clear to everyone in the team. From the dev/qa perspective Allure reports shorten common defect life cycle: test failures can be divided on bugs and broken tests, also logs, steps, fixtures, attachments, timings, history and integrations with TMS and bug-tracking systems can be configured, so the responsible developers and testers will have all information at hand.
Reasons why you use Allure reports
Below are some key reason why you choose Allure Reports
Clear Visualization:
- Allure creates dynamic reports with eye-catching graphs, charts, and other graphical features.
- Test results are provided in a way that is easy for stakeholders of both technical and non-technical backgrounds to understand.
Detailed Test Steps:
- Each test step in Allure is well described, including the input data, anticipated findings, and actual results.
- The clarity of test execution can be improved by including screenshots and logs related to each stage.
History and Trends:
- You may compare current results with previous runs using Allure’s historical test execution data storage feature.
- Teams may monitor the development of testing efforts over time by analysing historical patterns.
Automated Reports:
- Allure reports may be created automatically as an integral part of Continuous Integration (CI) pipelines, ensuring that the most recent reports are accessible during each test run.
- The reporting process is made simpler by integration with CI platforms, which also provide the development team with real-time feedback.
Support for Multiple Languages and Frameworks:
- Programming languages supported by Allure include Java, Python, Ruby, and JavaScript.
- It easily integrates with well-known testing frameworks like JUnit, TestNG, NUnit, and others.
Set-up Cypress
Installing Cypress
Below are the steps to install Cypress. However, you can go through this blog to get started with Cypress testing.
Step 1: Create a folder and Generate package.json.
- Create a project, naming it ‘talent500_Allure-Cypress’
- Use the npm init command to create a package.json file.
Step 2: Run the below command to install Cypress.
- In the project folder, run > npm install – save-dev cypress@11.2.0
- You can Cypress version 11.2.0 is reflected in package.json
Set-up Allure Reports
Step 1: Allure Installation
Enter the below commands in your command line to install allure
Using yarn:
yarn add -D@shelex/cypress-allure-plugin
Or
Using npm:
npm i -D @shelex/cypress-allure-plugin
npm install –save-dev mocha-allure-reporter allure-commandline
Step 2: Cypress Config File
Update Cypress Config File with below code under file ‘cypress.config.js’
/// <reference types=“@shelex/cypress-allure-plugin” />
const { defineConfig } = require(“cypress”);
const allureWriter = require(“@shelex/cypress-allure-plugin/writer”);
module.exports = defineConfig({
e2e: {
setupNodeEvents(on, config) {
allureWriter(on, config);
return config;
}
}
});
Here’s a breakdown of what this above configuration file is doing:
- <reference types=”@shelex/cypress-allure-plugin” /> : This line is a reference directive for TypeScript, indicating that the TypeScript compiler should include type definitions from the @shelex/cypress-allure-plugin package.
- const { defineConfig } = require(“cypress”): Importing the defineConfig function from the Cypress package.
- const allureWriter = require(“@shelex/cypress-allure-plugin/writer”):
- Importing the allureWriter function from the @shelex/cypress-allure-plugin/writer module. This function is likely used to set up Allure reporting.
- module.exports = defineConfig({ /* … */ }): Exporting a Cypress configuration object. Inside this object, you have an e2e property, which seems to be setting up a custom Node.js event called setupNodeEvents. This event likely hooks into Cypress’ test execution process.
- setupNodeEvents(on, config) { /* … */ }: This is where you configure the setupNodeEvents event. The allureWriter function is passed the on and config objects. You’re using this event to set up the Allure reporting with Cypress.
- allureWriter(on, config): This line invokes the allureWriter function, passing the on and config objects. The specifics of what this function does are determined by the @shelex/cypress-allure-plugin package. It’s likely responsible for integrating Allure reporting into your Cypress tests.
- return config: Finally, the modified config object is returned. This ensures that any changes made within the setupNodeEvents function are applied to the overall Cypress configuration.
Step 3: Update index.js
Then register the command of allure plugin under the path cypress/support/index.js file
import ‘@shelex/cypress-allure-plugin’;
Step 4: Update package.json with below Script
{
“name”: “talent500_allure-cypress”,
“version”: “1.0.0”,
“description”: “”,
“main”: “index.js”,
“scripts”: {
“clean:folders”: “rm -R -f allure-report/* && rm -R -f allure-results/*”,
“cy:run-test”: “cypress run –env allure=true”,
“generate-allure:report”: “allure generate allure-results –clean -o allure-report && allure open allure-report”,
“tests”: “npm run clean:folders && npm run cy:run-test && npm run generate-allure:report”
},
“author”: “Kailash Pathak”,
“license”: “ISC”,
“devDependencies”: {
“@shelex/cypress-allure-plugin”: “^2.40.0”,
“allure-commandline”: “^2.24.1”,
“cypress”: “^11.2.0”,
“mocha-allure-reporter”: “^1.4.0”
}
}
Walkthrough of package.json file
Here’s a breakdown of the key information in this file:
- Name: ‘talent500_allure-cypress’ – This is the name of your project or package.
- Version: 1.0.0 – This indicates the version of your project. Versions are typically in the format of major.minor.patch.
- Description: (empty) – A brief description of your project could be placed here.
- Main: index.js – This specifies the entry point of your application (the main JavaScript file).
- Scripts:
- clean:folders: This script removes the contents of allure-report and allure-results folders.
- cy:run-test: This script runs enable allure integration enabled.
- generate-allure:report: This script generates an Allure report using the results from the tests.
- tests: This is a custom script that runs in sequence: cleaning folders, running tests, and generating the Allure report.
- Author: Kailash Pathak – The author of the project.
- License: ISC – The type of license for your project. ISC is a permissive open source license similar to the MIT License.
- DevDependencies: Inside this section we have placed all devDependenciesi.e Cypress (^11.2.0), Allure plugin for Cypress (^2.40.0), Allure commandline tool (^2.24.1), and Mocha Allure reporter (^1.4.0).
Step 2: Create Test Case
Let’s create a test case for
|
/// <reference types=“cypress” />
describe(“https://talent500.co/ , Login & Logout “, () => {
it(“Logs in successfully and verifies links in header”, () => {
cy.visit(“https://talent500.co/auth/signin”);
cy.get(‘[name=”email”]’).focus();
cy.get(‘[name=”email”]’).type(“applitoolsautomation@yopmail.com”);
cy.get(‘[name=”password”]’).focus();
cy.get(‘[name=”password”]’).type(“Test@123”);
cy.get(‘[type=”submit”]’).eq(1).click({ force: true });
cy.contains(“PROFILE”).should(“be.visible”);
cy.get(‘img[alt=”DropDown Button”]’).click({ force: true });
cy.contains(“Logout”).click();
cy.contains(“Opportunities favor the bold”).should(“be.visible”);
});
});
Step 3: Execute the test case
Lets run the command
npm run tests
npm run tests
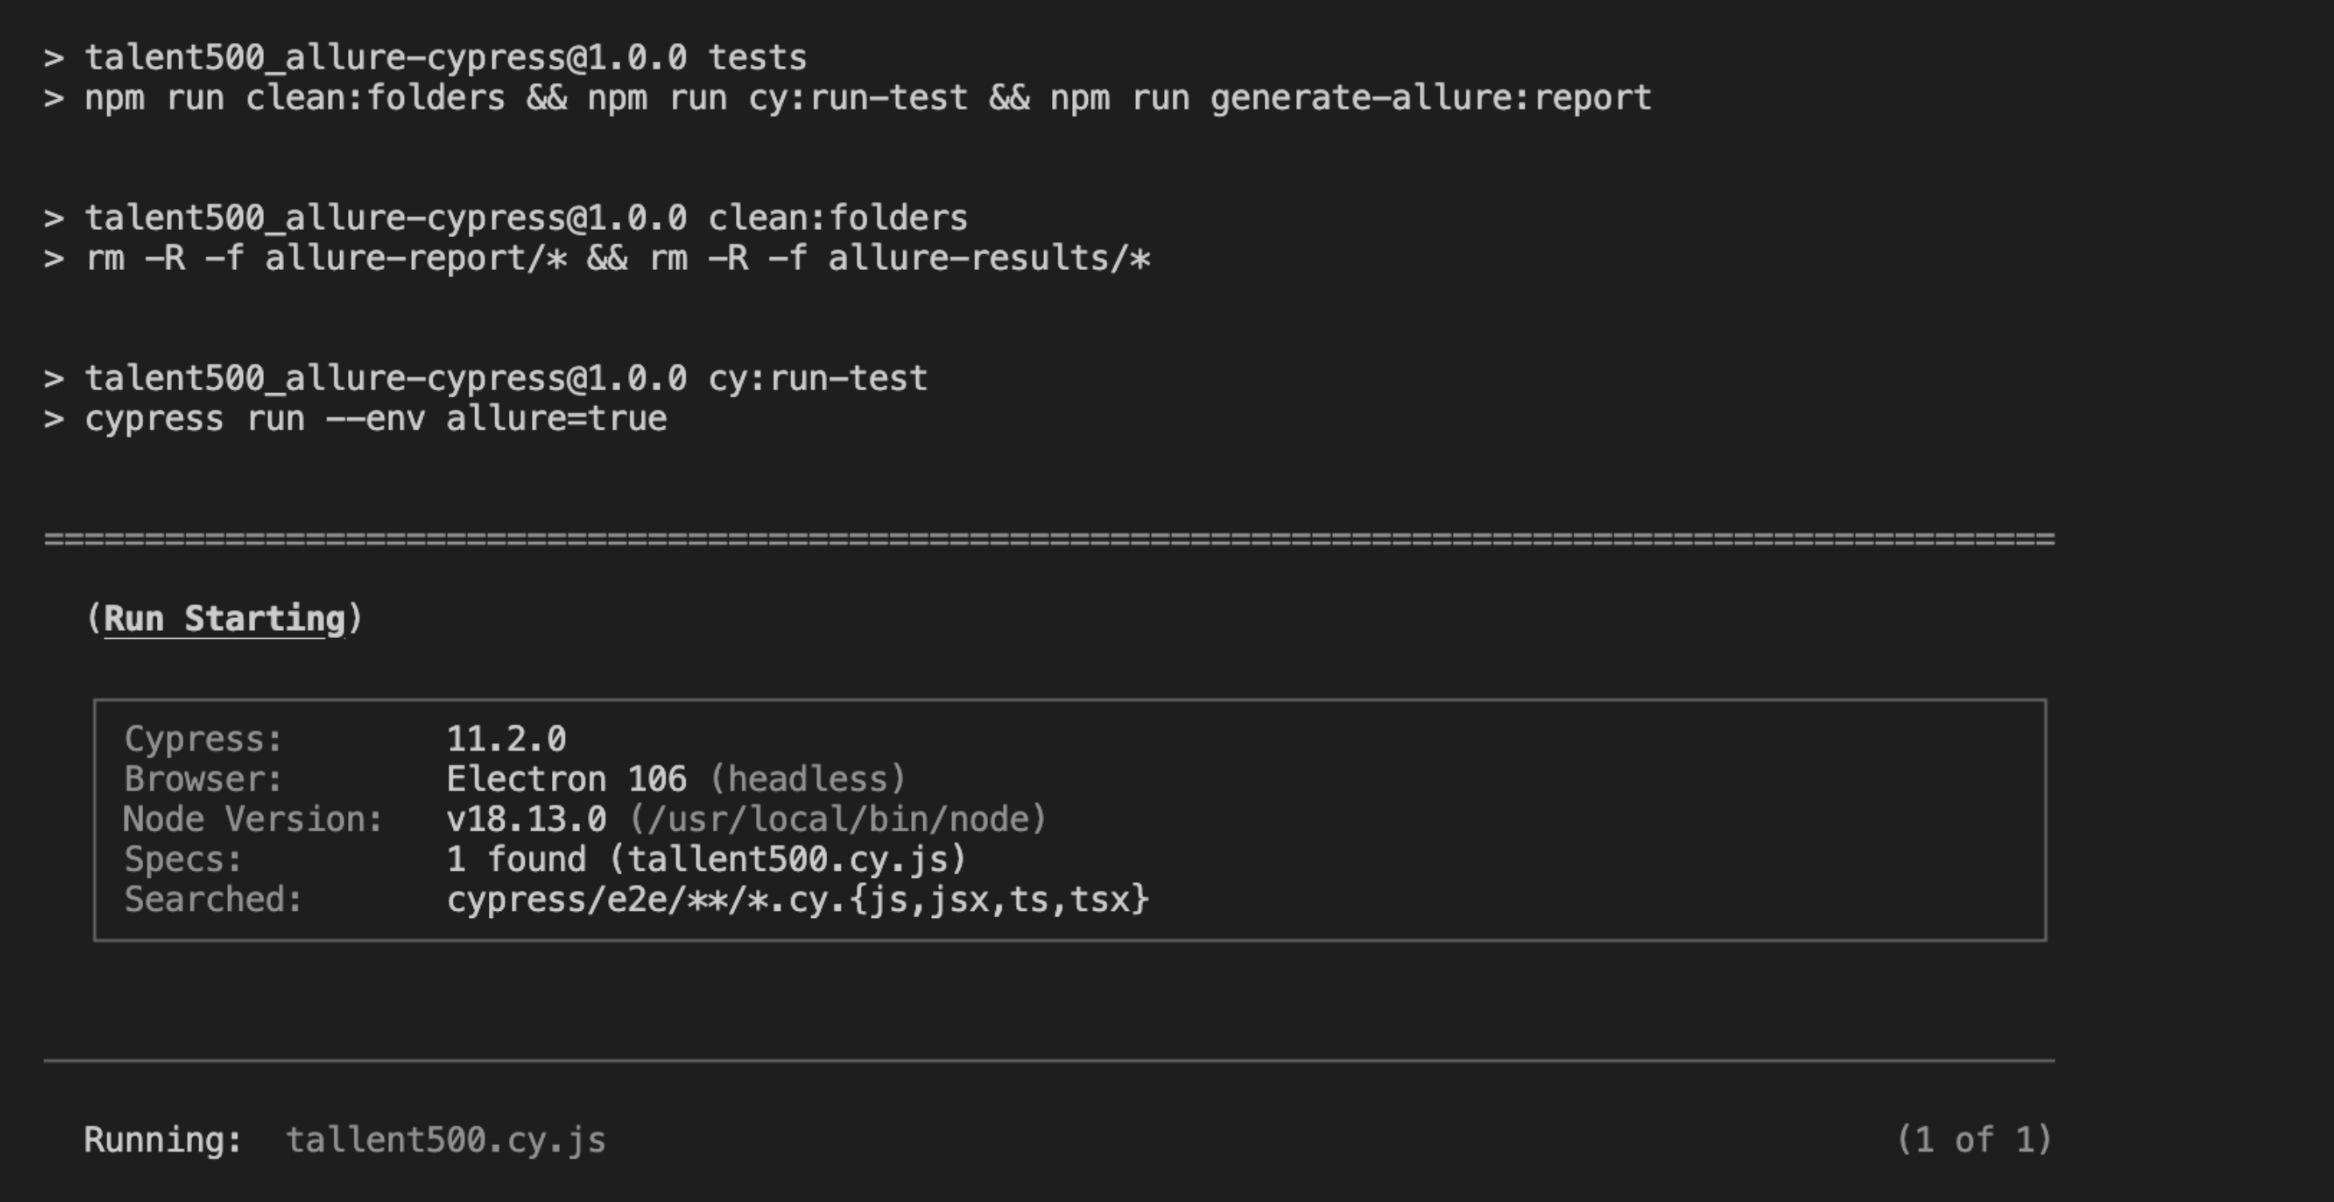
As we run the test case using the command ‘npm run tests’ . You can see the below command start executing in terminal
“npm run clean:folders && npm run cy:run-test && npm run generate-allure:report”
Commands are run in below sequence
- First command ‘npm run clean:folders’ will clean the folders (allure:report,allure:results ) if already created
- Second command ‘npm run cy:run-test’ run the test cases from e2e folders
- Third command ‘npm run generate-allure:report’ will generate the allure report
In below screenshot you can see one test case found for execution and test case execution is started
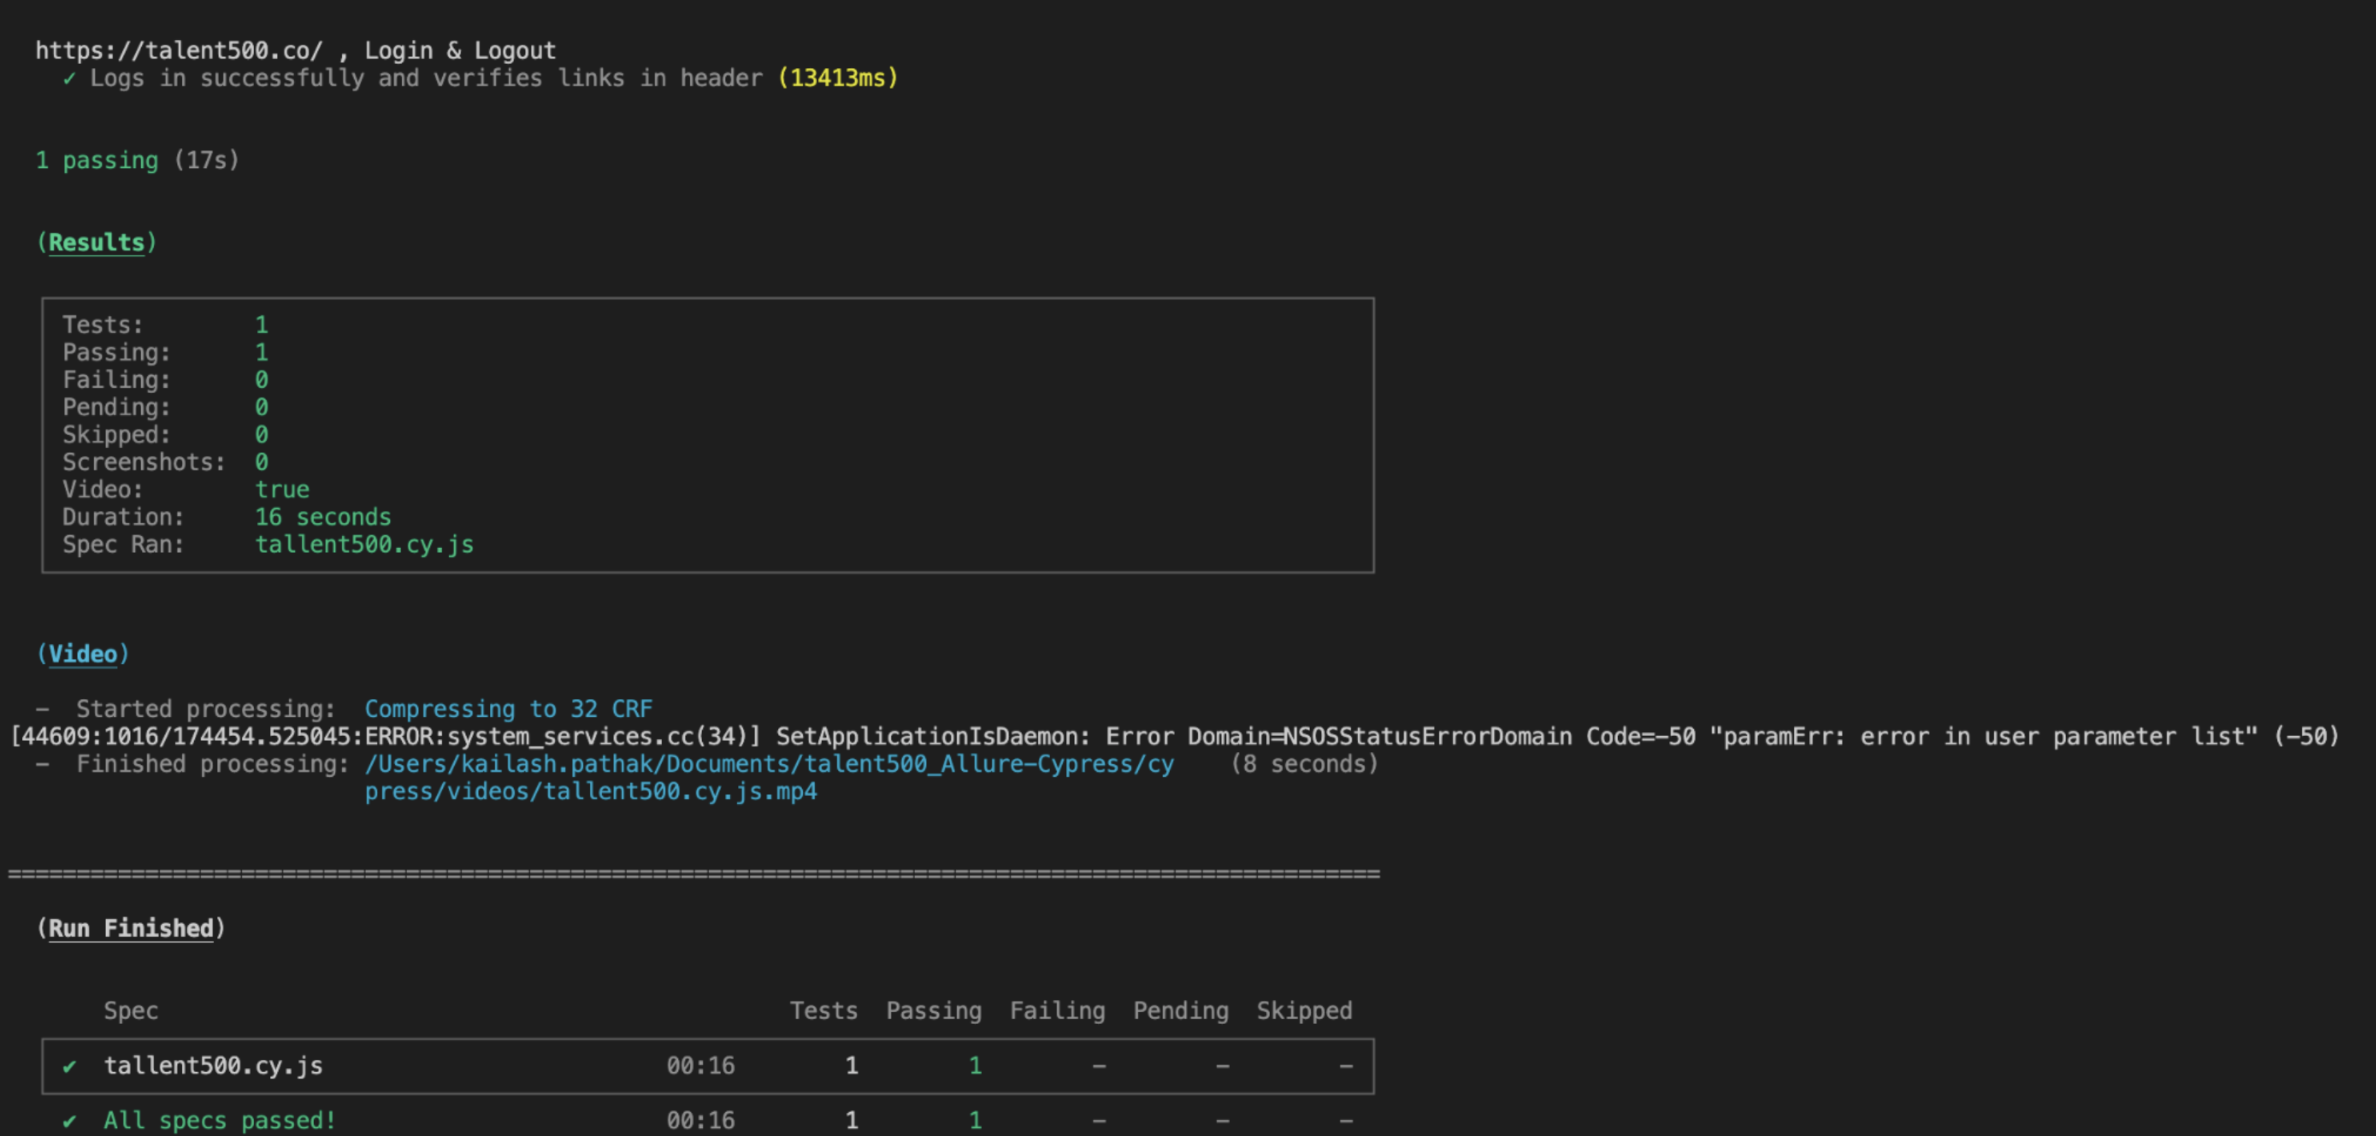
In below screenshot you can see test cases are executed successfully
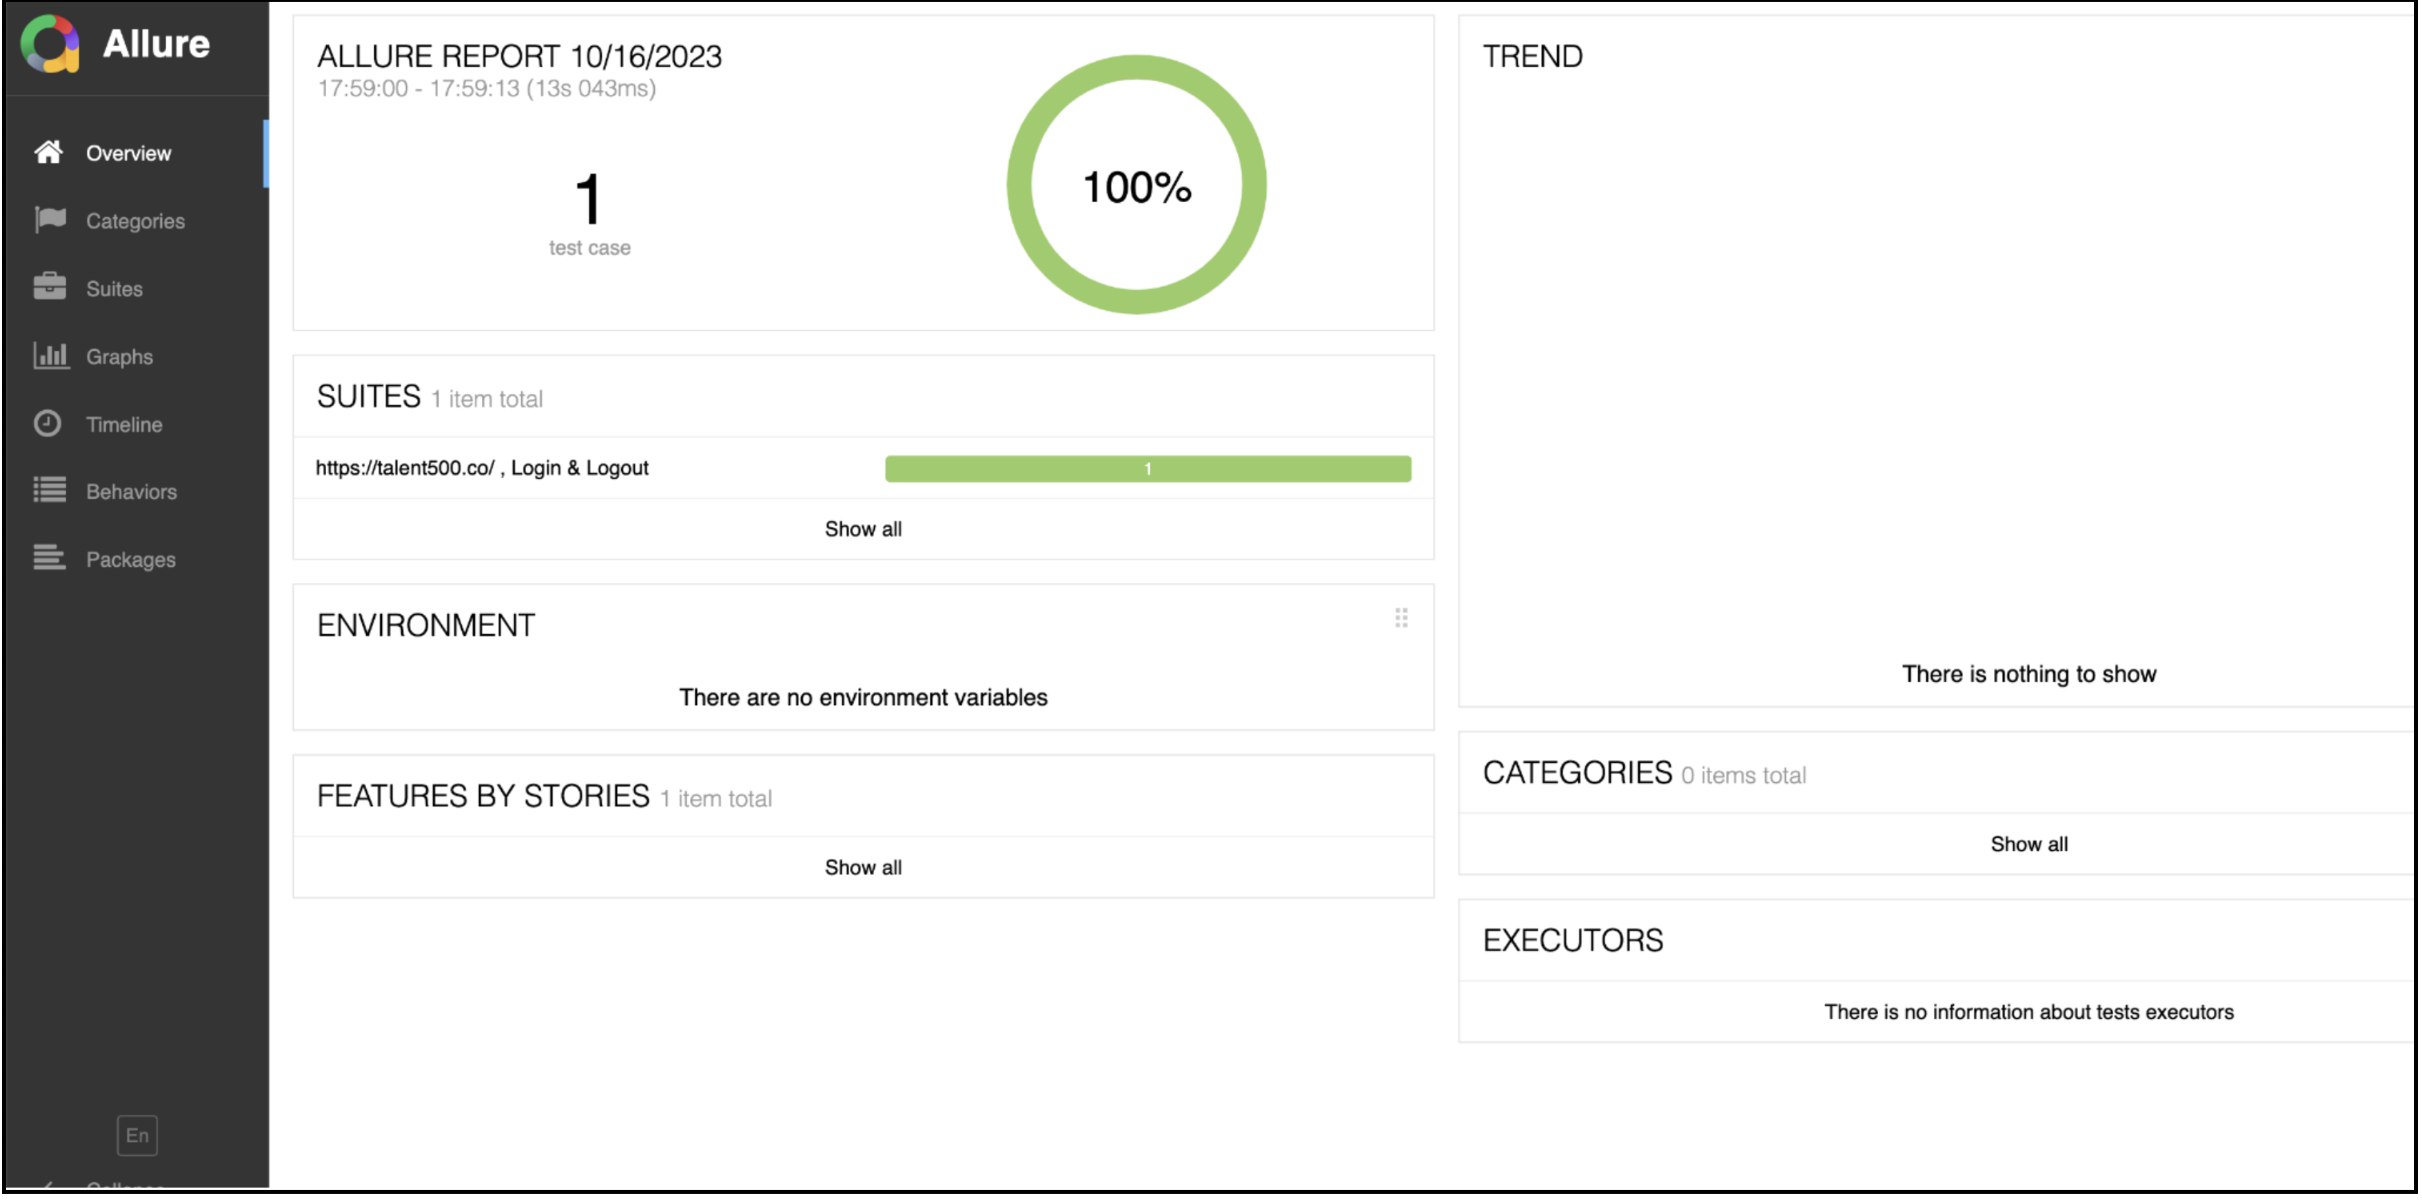
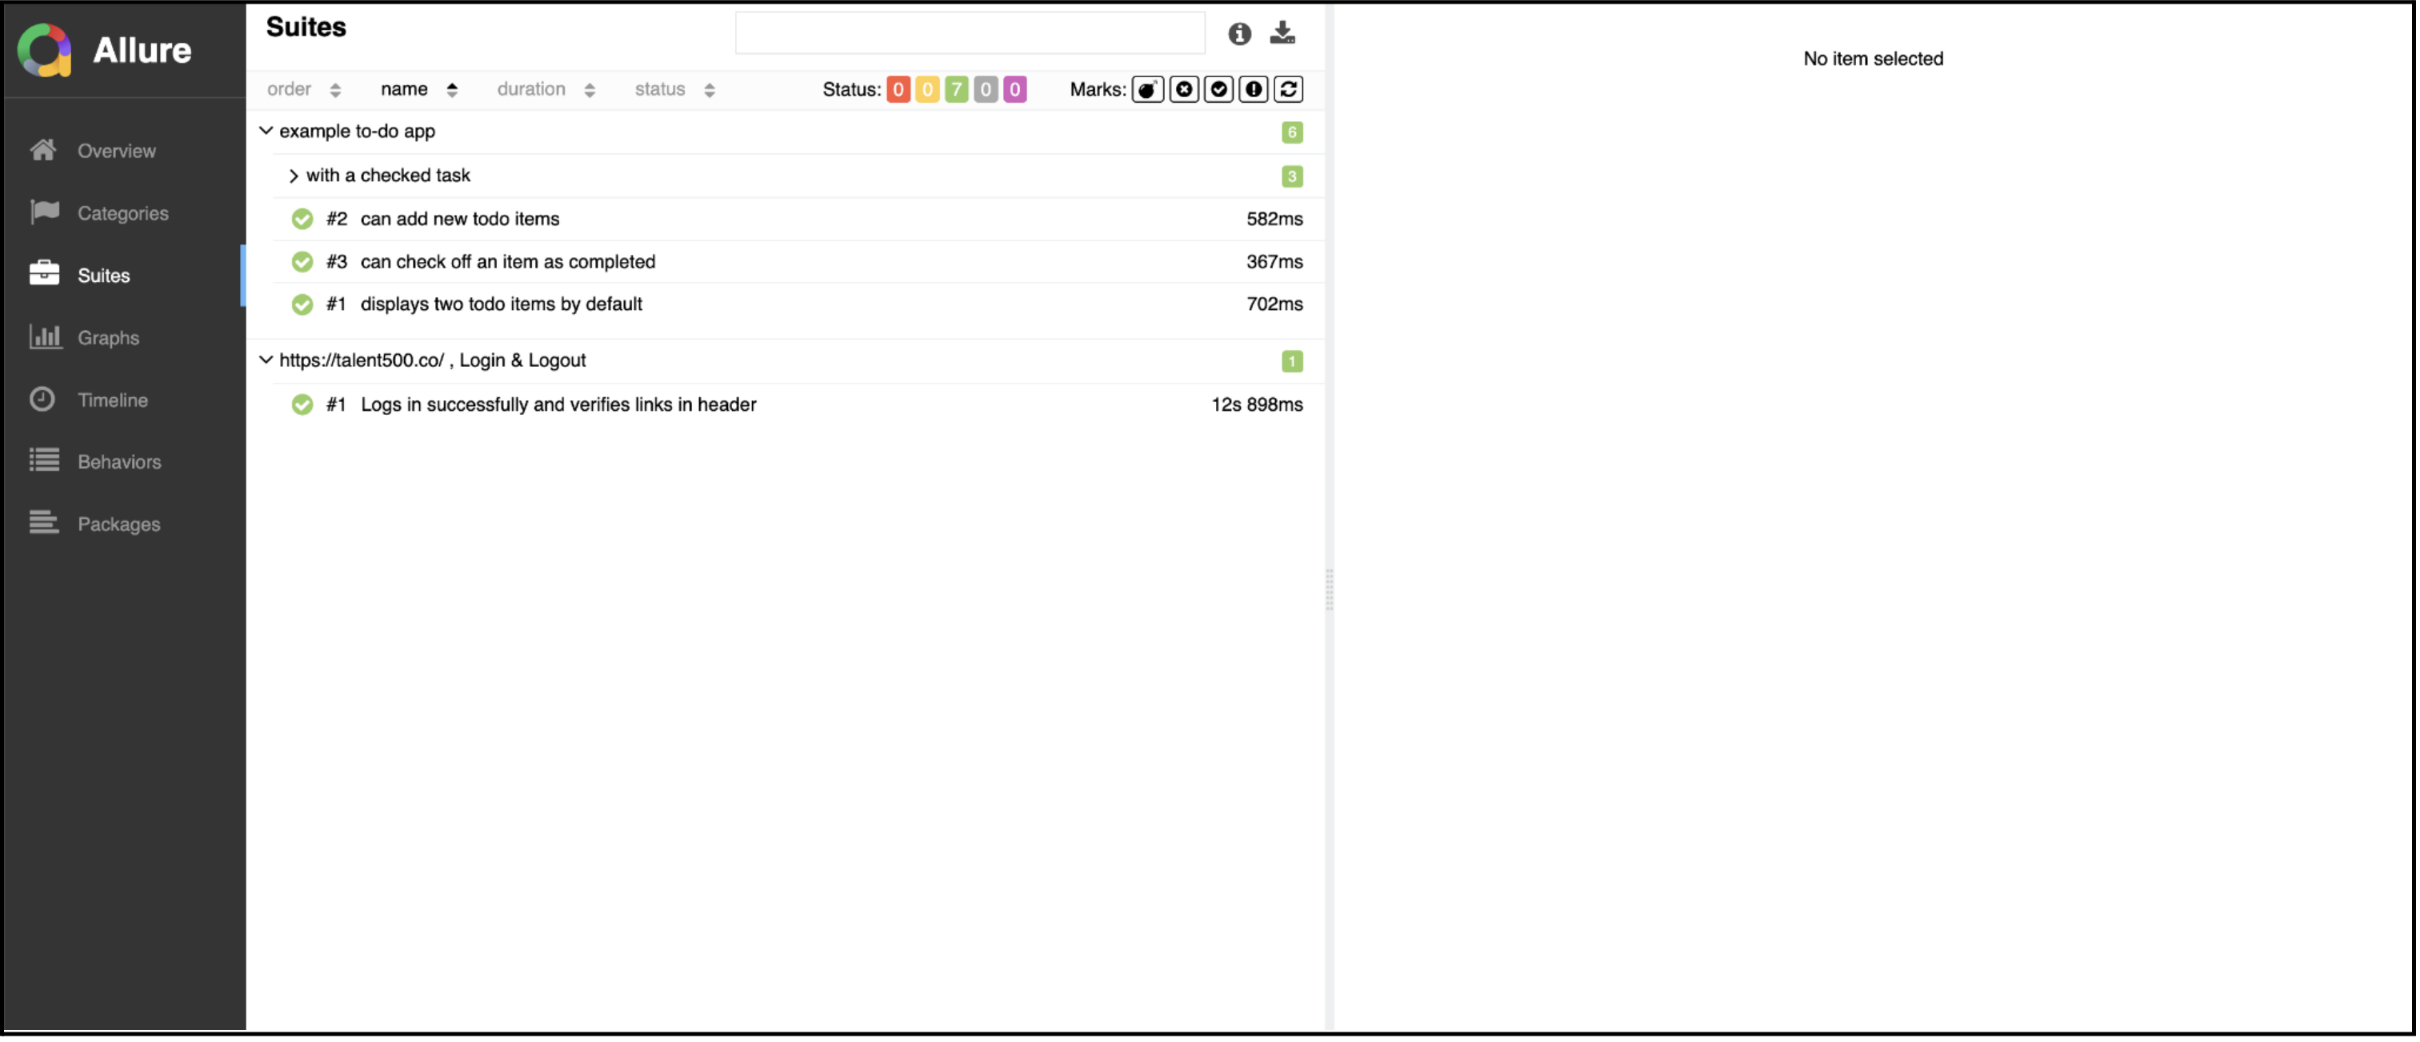
FInally you can see see below command run and generate the allure report
‘allure generate allure-results –clean -o allure-report && allure open allure-report’
Step 4: Fail Scenario
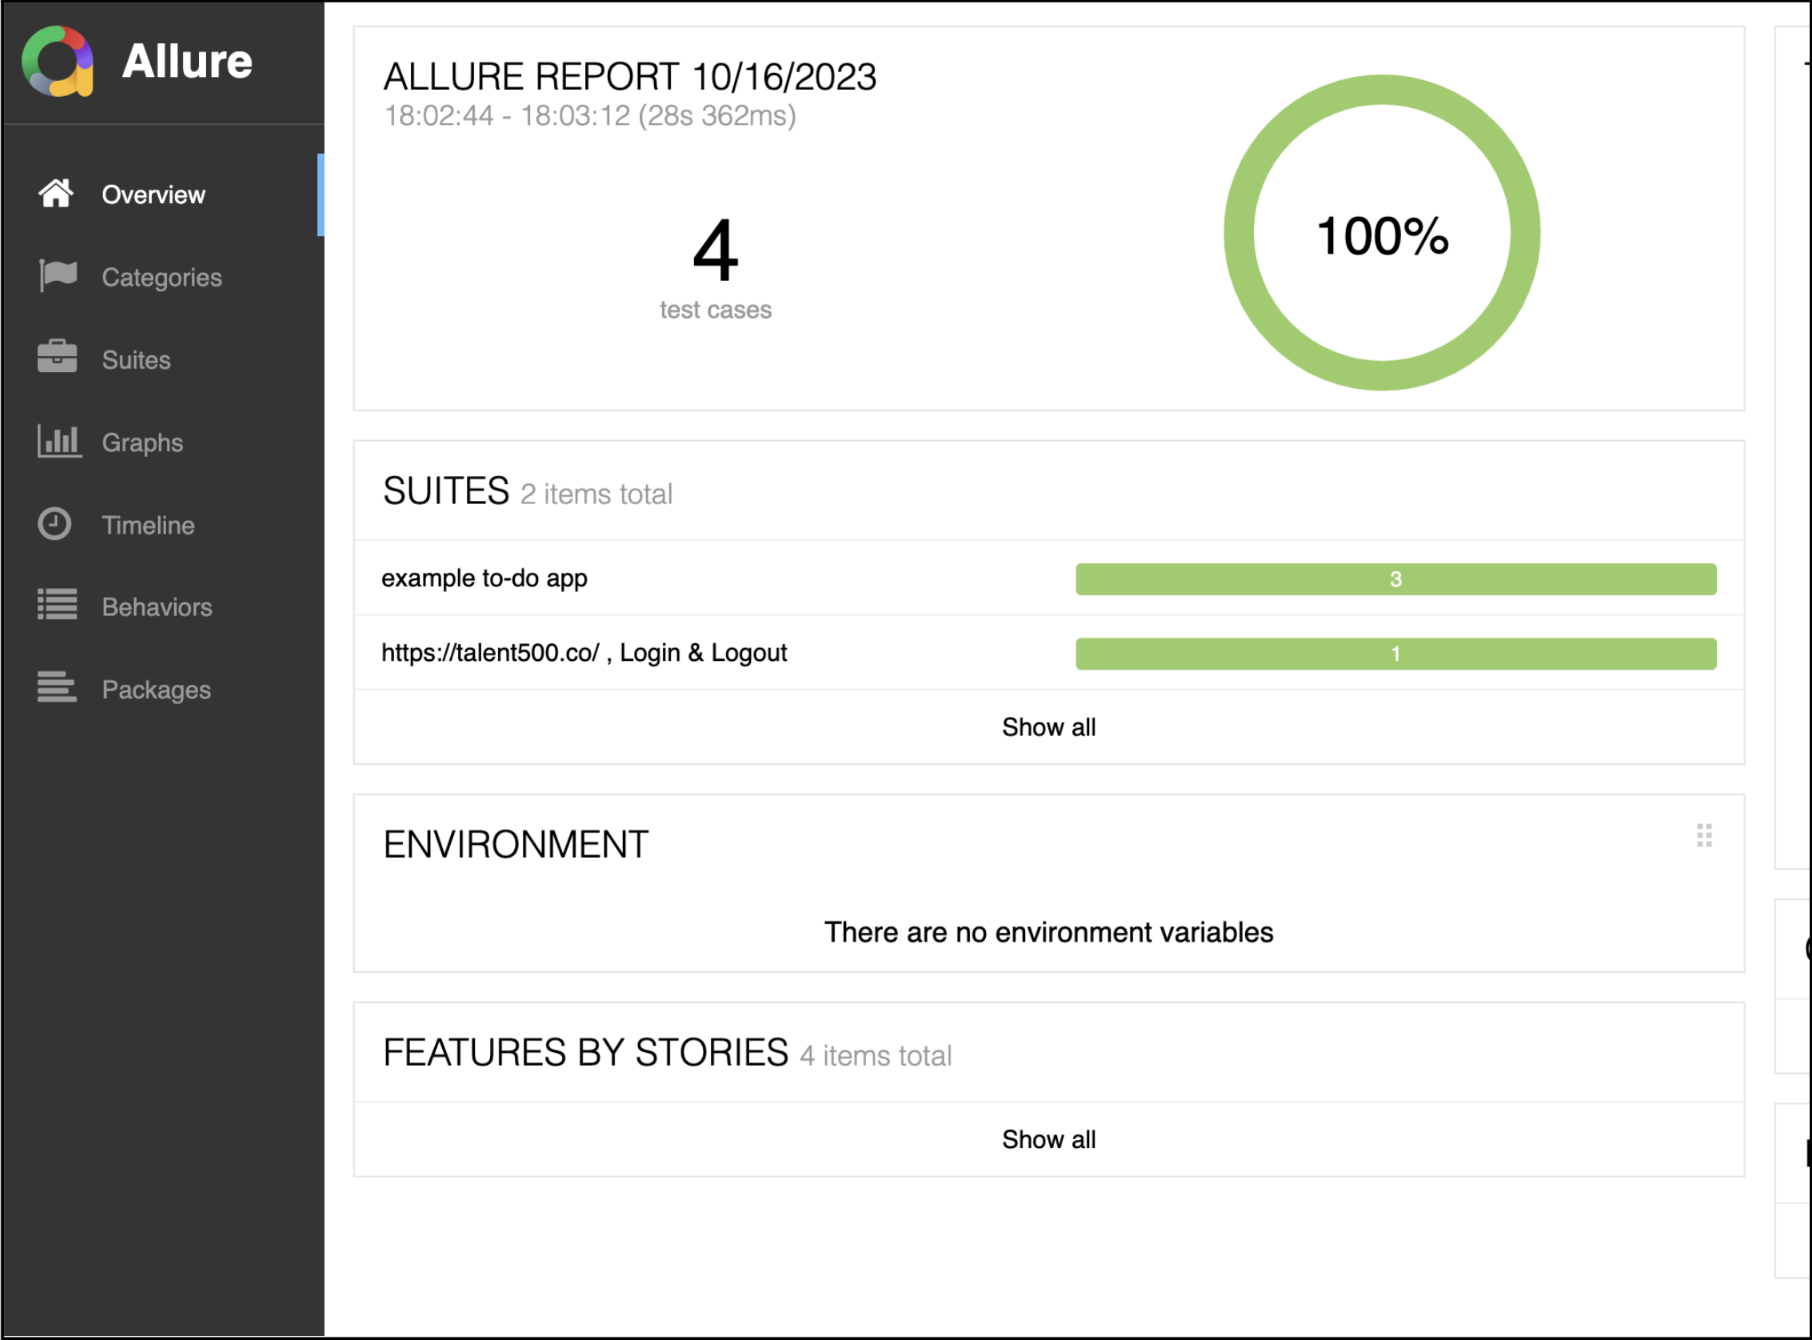
Add some more test cases and failed some of the test cases. In the below screenshot you can see I have added one more test case and initially both test cases are passing
Fail Case :
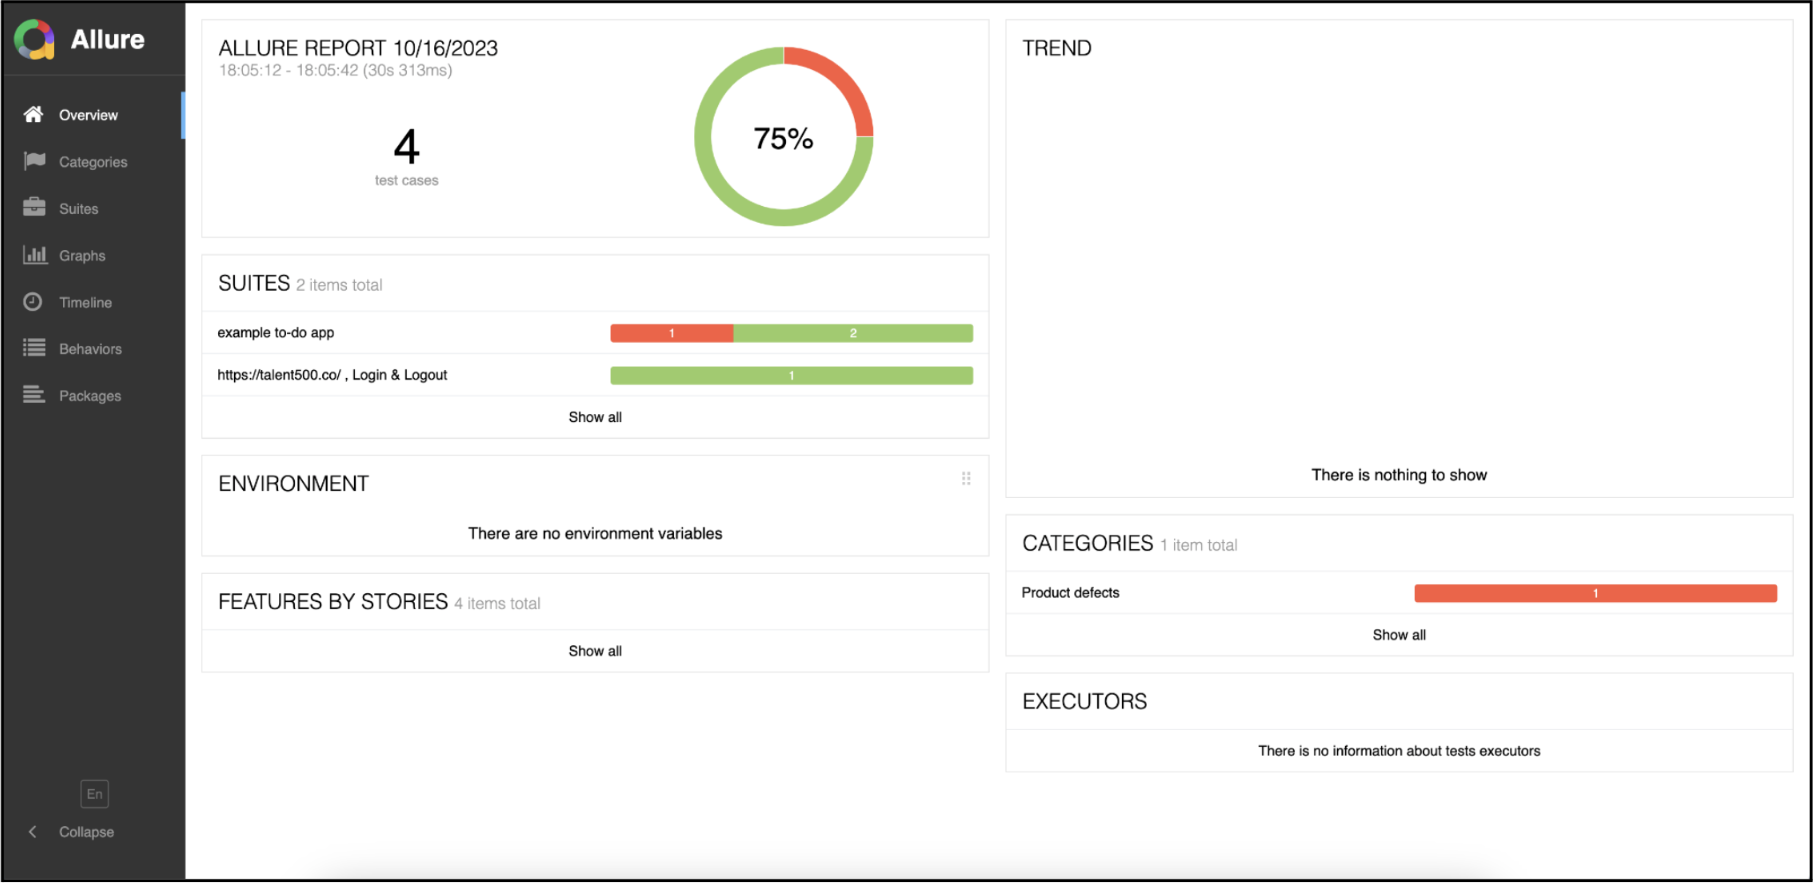
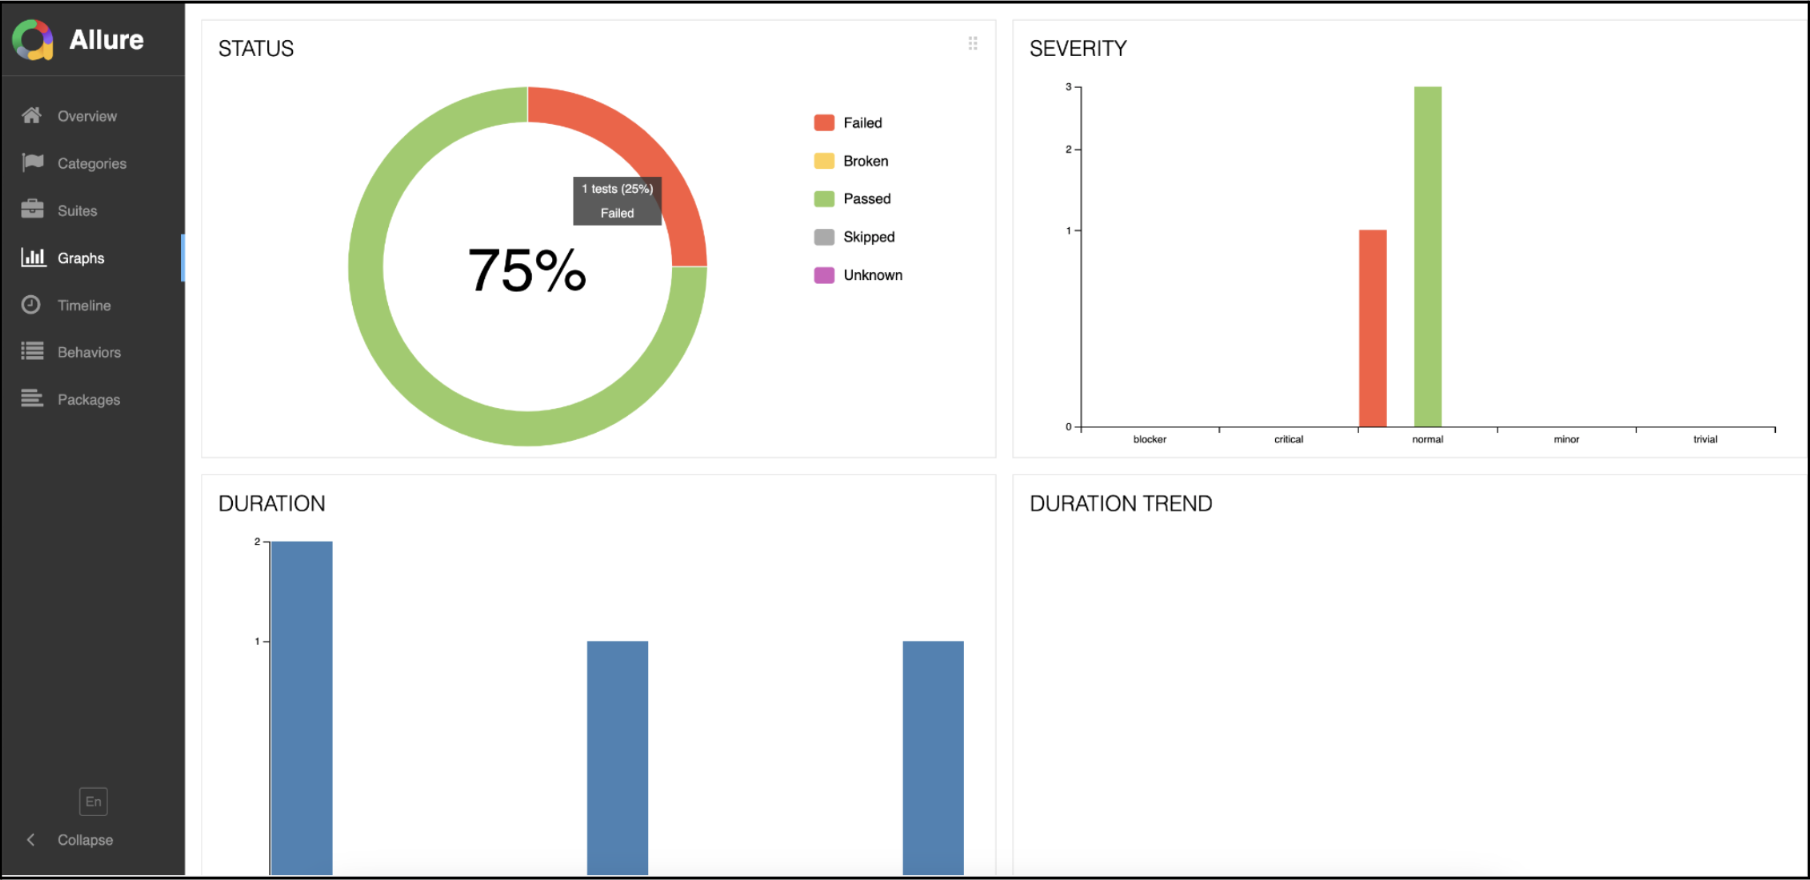
Let’s fail one of the test cases to see how the report looks when test cases fail. In the below report you can see in the First test case we have a total of 3 test cases. Among 3 test cade 1 test case is failing and 2 test case are passing
Wrapping up
Integrating Allure with Cypress elevates the quality of test reporting by generating comprehensive, visually appealing summaries of test cases. Allure reports provide a thorough analysis of each test, including crucial information like status, execution time, specific actions taken throughout the test, and supplemental screenshots. This degree of detail gives stakeholders and testers a thorough understanding.
By leveraging this integration, development teams gain valuable insights into the performance and reliability of their applications, fostering continuous improvement and ensuring the delivery of high-quality software products


Add comment