In the fast-evolving realm of software development, ensuring the quality of software products is of utmost importance. Quality Assurance (QA) plays a crucial role in achieving this objective. However, manual testing alone is not sufficient to meet the demands of modern software development. To address this challenge, the concept of Continuous Integration and Continuous Delivery (CI/CD) has emerged as a game-changer. CI/CD pipelines automate the testing and deployment process, enabling faster and more reliable software releases.
In this blog, we will explore the implementation of CI/CD pipelines for QA automation using two popular tools: Jenkins and GitLab.
A Brief Introduction to CI/CD Pipelines
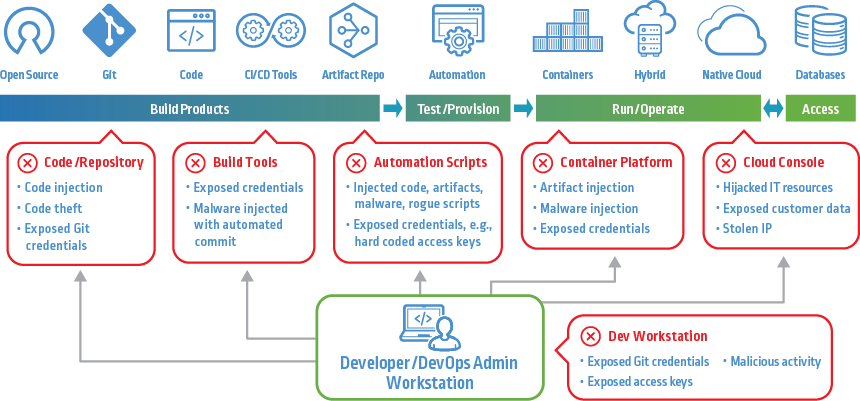
Continuous Integration (CI) involves regularly integrating code changes from developers into a shared repository. Automated builds and tests are triggered with every code commit, ensuring early detection of integration issues. Continuous Delivery (CD), on the other hand, is the extension of CI, allowing for automated deployment of code to production or staging environments after passing QA tests.
Let us begin by installing and configuring Jenkins or GitLab, depending on your preference, to set up a CI/CD pipeline for QA automation.
Installing Jenkins or GitLab
If you choose Jenkins for your CI/CD pipeline, follow the below given steps:
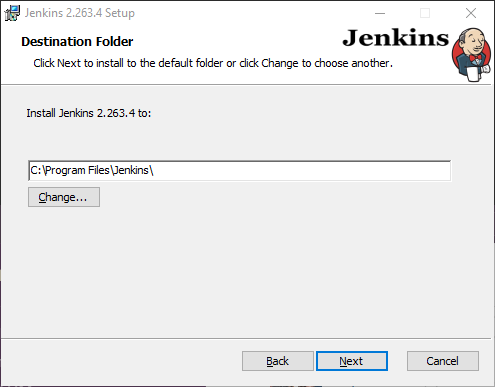
Download and Install Jenkins
bash
# Add the repository key to your system
wget -q -O – https://pkg.jenkins.io/debian-stable/jenkins.io.key | sudo apt-key add –
# Add the Jenkins repository to your package sources
sudo sh -c ‘echo deb http://pkg.jenkins.io/debian-stable binary/ > /etc/apt/sources.list.d/jenkins.list’
# Update your package index
sudo apt-get update
# Install Jenkins
sudo apt-get install jenkins
Start Jenkins Service:
bash
sudo systemctl start jenkins
Access Jenkins Web Interface:
Open your web browser and navigate to http://localhost:8080.
Follow the instructions to complete the Jenkins setup.
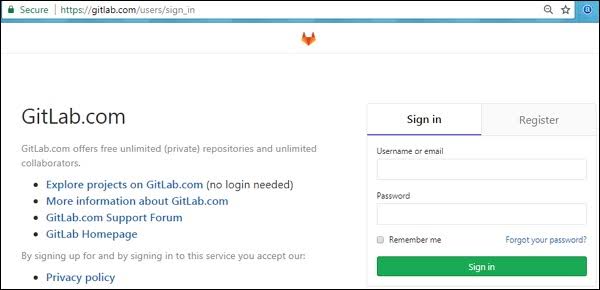
If you prefer GitLab, follow the below given steps:
Install GitLab:
Refer to the official GitLab documentation for installation instructions specific to your OS.
Access GitLab Web Interface:
Once installed, open your web browser and navigate to http://localhost to set up your GitLab account and password.
Setting Up QA Automation Project
To set up a project, we will use a simple web application and write automated tests for it using Selenium and JUnit. The web application can be any web page with basic form elements.
Create a Maven Project:
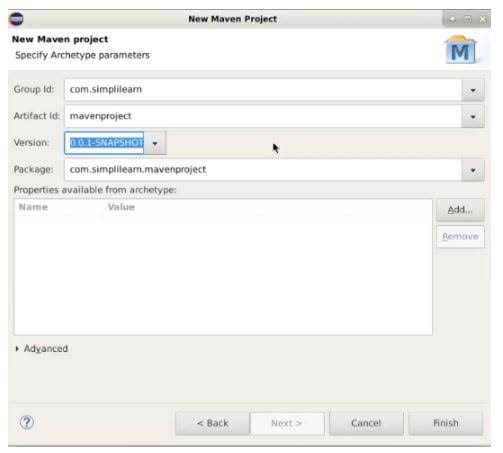
Create a new Maven project and add the necessary dependencies in the pom.xml file.
xml
<!– Selenium WebDriver –>
<dependency>
<groupId>org.seleniumhq.selenium</groupId>
<artifactId>selenium-java</artifactId>
<version>3.141.59</version>
</dependency>
<!– JUnit 5 –>
<dependency>
<groupId>org.junit.jupiter</groupId>
<artifactId>junit-jupiter-api</artifactId>
<version>5.8.1</version>
<scope>test</scope>
</dependency>
Write a Selenium Test
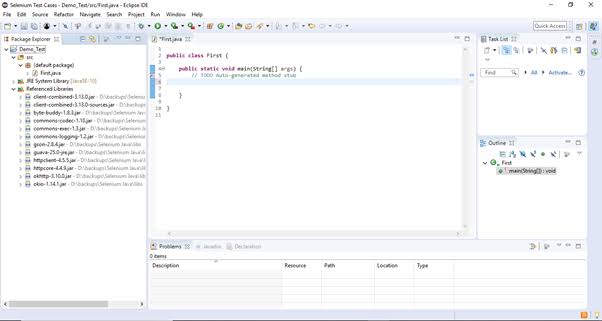
Create a test class that extends JUnit5 and write a simple test to interact with the web application.
java
import org.junit.jupiter.api.Test;
import org.openqa.selenium.WebDriver;
import org.openqa.selenium.chrome.ChromeDriver;
import static org.junit.jupiter.api.Assertions.assertEquals;
public class WebAppTest {
private WebDriver driver;
@Test
public void testWebApp() {
System.setProperty(“webdriver.chrome.driver”, “path/to/chromedriver”);
driver = new ChromeDriver();
driver.get(“http://localhost:8080/webapp”);
// Perform interactions and assertions
// …
driver.quit();
}
}
Configuring Jenkins or GitLab CI/CD Pipeline
Now that we have a QA automation project set up, it’s time to create a CI/CD pipeline using Jenkins or GitLab.
For Jenkins:
Create a New Jenkins Job:
- Open Jenkins web interface.
- Click on “New Item” and enter a name for your project.
- Select “Freestyle project” and click “OK.”
- Configure Source Code Management:
- Under “Source Code Management,” select your version control system (e.g., Git) and provide the repository URL.
Set Up Build Triggers:
- Under “Build Triggers,” select “Poll SCM” and set a schedule (e.g., * * * * *) to check for changes.
Add Build Step:
- Under “Build,” click on “Add build step” and select “Invoke top-level Maven targets.”
- In the “Goals” field, enter a clean test to run the Maven build and execute the automated tests.
Save and Run:
- Save the Jenkins job configuration and click “Build Now” to trigger the first build.
For GitLab:
Create a New GitLab CI/CD Configuration
File: In the root of your repository, create a file named .gitlab-ci.yml.
Define Stages and Jobs:
yaml
Copy code
stages:
– test
test:
stage: test
script:
– mvn clean test
Commit and Push
Commit the .gitlab-ci.yml file to your repository and push the changes.
GitLab Runner
Ensure that you have a GitLab Runner installed and registered on the machine where tests will be executed.
Observing CI/CD in Action
With our CI/CD pipeline set up, let’s observe how the process works:
Push Code Changes:
Make some changes to your web application code, commit, and push them to the repository.
CI/CD Pipeline Triggers:
For Jenkins, the pipeline will be triggered automatically due to the “Poll SCM” build trigger. For GitLab, the pipeline starts automatically on each code push.
Test Execution:
The CI/CD pipeline will build the project, execute the automated tests, and generate test reports.
Notification and Deployment:
Based on the test results, the pipeline will send notifications about the build status. If all tests pass, it can automatically deploy the application to a staging environment for further testing.
Conclusion
Implementing Continuous Integration and Continuous Delivery (CI/CD) pipelines for QA automation is a crucial step towards achieving faster, reliable, and high-quality software releases. Jenkins and GitLab are powerful tools that enable smooth automation of the testing and deployment process. By following the steps outlined in this blog, you can easily set up your CI/CD pipeline, thereby enhancing the efficiency of your QA process.
Remember that continuous improvement is key to successful CI/CD implementation. Regularly review and refine your pipeline, adding more sophisticated tests, integrating security checks, and expanding the deployment stages. Embrace the culture of automation, collaboration, and feedback to create a robust and seamless software delivery pipeline.
With CI/CD in place, developers and QA teams can focus on innovation, leaving mundane tasks to automation, and delivering value to end-users consistently and efficiently.



Add comment