

AWS Amplify is a set of tools and services that enables developers to build scalable mobile and web applications using AWS services.
In this tutorial, we are going to learn-
- Installing AWS CLI.
- Amplify Configuration.
- Adding Amplify To Flutter Apps.
- Connecting To S3.
- Uploading Images in S3.
Before you begin, make sure you have the following installed:
- Flutter version 2.10.0 or higher.
And of course, you must have an AWS console account.
1.Installing AWS CLI.
To Install AWS CLI run the following command in your terminal-
`npm install -g @aws-amplify/cli`
If you have already installed node.js and npm properly in your system then this command installed the AWS Amplify CLI in your system.
You can verify whether it is installed or not by using the following command amplify – -version. It returns the currently installed version of AWS Amplify CLI.
2.Amplify Configuration
Now you need to set up an AWS Account using the Amplify CLI. To configure the AWS account run the following command in terminal
amplify configure
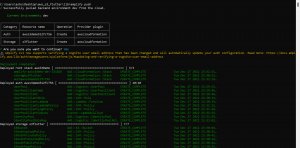
When you hit this command it redirects you to the page to log in to the AWS console. Log in to the console if you have not. Once you sign in Amplify CLI will ask you to create an IAM user.
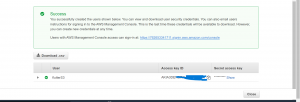
Follow all the steps to create a new IAM User. When you successfully create a new user AWS CLI asks you to provide accessKeyId and secretAccessKeyId to connect AWS Amplify.
Copy the accessKeyId and secretAccessKeyId and paste them into the terminal.


After entering accessKeyId and secretAccesKey, it asks you to give the AWS profile name; it’s only for the local machine.
After this, you have successfully configured AWS amplify in your system. Now you are ready to communicate with AWS amplify services using amplify CLI.
3.Adding Amplify To Flutter Apps.
Create a flutter project by running the command-
flutter create <your project name>
This command creates a flutter project name <your project name> that contains a simple demo app.
After creating a flutter app now it’s time to connect amplify to the flutter app. For this we have to run the amplify init command in the flutter project directory.
To initialise the amplify enter the following when prompted-
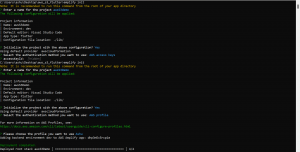

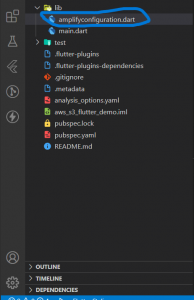
When amplify initialises successfully in your flutter apps it creates an amplifyconfiguration.dart file inside the lib folder.
This file will contain the configurations of the services. But for now, it shouldn’t contain many lines, since we haven’t configured storage yet.

4.Connect to S3-
To set up a storage resource run the following command in your root directory of the flutter project
amplify add storage
It asks you some questions, please answer the questions when prompted-
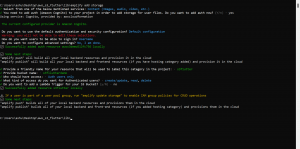

After successfully adding the storage service, we have to publish the changes to AWS . For this, run the following command
amplify push
It takes a while for the first time, till then you can grab a cup of coffee and let this command do the job to create resources in the AWS cloud.

Now we are done with the AWS amplify setup. Now it’s time to work on the flutter side.
5.Uploading Images in S3.
- Add Required Dependencies-
In puspec.yaml in your flutter add the following package-
amplify_flutter: <latest version>
amplify_auth_cognito:<latest version>
amplify_storage_s3: <latest version>
image_picker: <latest version>
And run flutter pub get to download the dependencies in your flutter project.
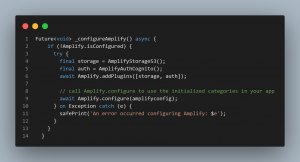
- Configure Amplify In Flutter App.
Configures Amplify with the provided configuration string. This method can only be called once after all the plugins have been added and no plugin shall be added after amplify is configured. Customers are expected to call Amplify.isConfigured to check if their app is configured before calling this method.

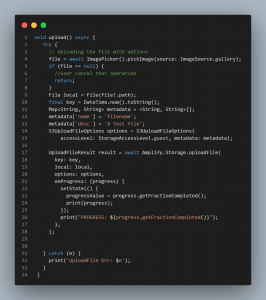
- Upload File-
Here is the code of the upload() function. The code is very straightforward.
- Firstly we get an image file that we want to upload using the ImagePicker library.
- Then we declare an S3UploadFIleOption which takes accessLevel and metadata of the file.
- After that we are called Amplify.Storage.uploadFile() function that accepts –
key- it’s a unique string. Here we are passing a timestamp as a string.
options: that we have already declared above.
Local- file object.

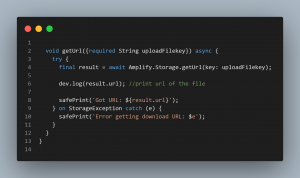
- Get the URL of the file.
getUrl() function takes the key of the uploaded file URL and returns the URL of the image.

Conclusion
In this article, we learn how to install AWS CLI in our system, how to configure AWS amplify account, and then upload the image in S3 using the flutter application.
