Extract, transform, load (ETL) processes are common in data integration scenarios, where data from multiple sources need to be combined and transformed into a useful format for downstream applications. However, these processes can be time-consuming and error-prone, especially when dealing with large amounts of data from multiple sources. Apache NiFi is an open-source tool that can automate ETL processes, making them faster, more reliable, and less prone to errors. In this blog, we will explore how to use Apache NiFi to automate ETL processes.
What is Apache NiFi?
Apache NiFi is an open-source data integration tool that allows users to automate data flows between systems. It provides a web-based interface that enables users to design and manage dataflows using a drag-and-drop approach. NiFi is designed to be scalable and fault-tolerant, making it suitable for enterprise-level data integration.
NiFi is built on top of a powerful framework that enables it to perform complex data transformations, routing, and validation. It also supports a wide range of data sources and destinations, including Hadoop, HDFS, S3, Kafka, and more. NiFi can also be extended through custom processors, which can be written in Java, Groovy, or Python.
NiFi’s Key Features:
- Web-based interface
- Scalable and fault-tolerant
- Supports a wide range of data sources and destinations
- Built-in security features
- Supports custom processors
NiFi Workflow
NiFi workflows are created using processors, which represent individual steps in the dataflow. These processors are connected to each other using relationships, which define the order in which data is processed. NiFi also supports the creation of custom processors, which can be used to perform specific data transformations.
NiFi provides a variety of processors that can be used to perform data transformations, routing, and validation. These processors include:
Input processors – Used to read data from various sources such as files, databases, and message queues.
Output processors – Used to write data to various destinations such as files, databases, and message queues.
Transformation processors – Used to transform data into a different format.
UpdateAttribute Processor- Used to make basic usage changes and conditional changes to a flow file at the same time.
PutDatabaseRecord Processor- Used to input records from an incoming flow file.
Routing processors – Used to route data based on conditions.
Validation processors – Used to validate data against predefined rules.
Here is an example code for the UpdateAttribute processor:
json
{
“name”: “UpdateAttribute”,
“config”: {
“properties”: {
“Add property”: “value”,
“Update property”: “new value”
}
}
}
And an example code for the PutDatabaseRecord processor:
json
{
“name”: “PutDatabaseRecord”,
“config”: {
“properties”: {
“Database Connection URL”: “jdbc:mysql://localhost:3306/database”,
“Database Driver Class Name”: “com.mysql.jdbc.Driver”,
“Username”: “username”,
“Password”: “password”,
“Table Name”: “table”,
“Schema Name”: “schema”,
“Field Mapping”: “field1=value1,field2=value2”
}
}
}
Now, let’s dive into the actual implementation of ETL using NiFi.
Implementing ETL with Apache NiFi:
The following are the steps to implement ETL with Apache NiFi.
Step 1: Install NiFi:
To install NiFi, follow the instructions provided on the official Apache NiFi website. Once NiFi is installed, start the NiFi service using the following command:
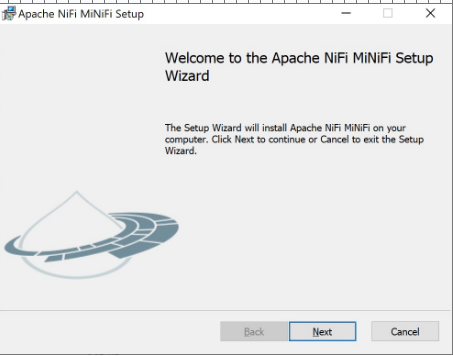
bin/nifi.sh start
Step 2: Create a NiFi Dataflow:
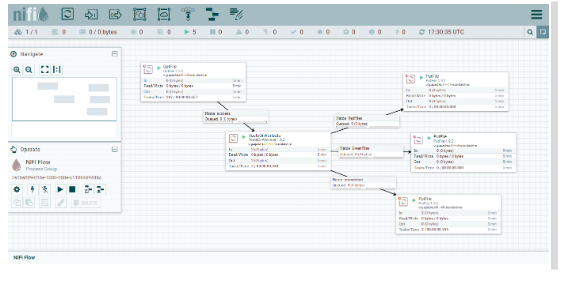
To create a new dataflow in NiFi, follow these steps:
- Open a web browser and navigate to the NiFi web UI (by default, it is available at http://localhost:8080/nifi).
- Click on the “Create a new process group” button to create a new process group.
- Give the process group a name and click on the “Create” button.
- Drag and drop the required processors onto the canvas.
- Connect the processors by drawing relationships between them.
- Configure the processors by double-clicking on them and setting the appropriate properties.
Step 3: Extract Data:
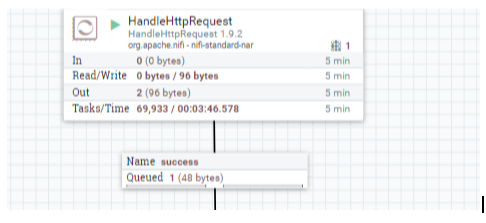
To extract data from a source, use the appropriate input processor. For example, if you want to extract data from a CSV file, use the “GetFile” processor. Configure the processor by specifying the file path, file filter, and other properties.
Step 4: Transform Data:
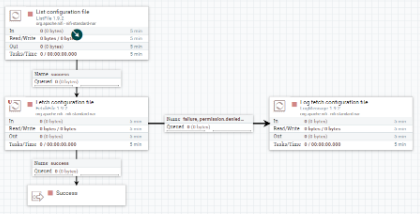
To transform data, use the appropriate transformation processor. For example, if you want to convert the CSV data to JSON, use the “ConvertRecord” processor. Configure the processor by specifying the input and output formats, and the transformation rules.
Step 5: Load Data
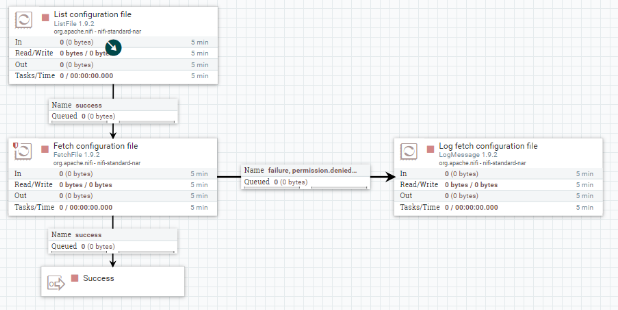
To load the transformed data into a destination, use the appropriate output processor. For example, if you want to load the JSON data into a database, use the “PutDatabaseRecord” processor. Configure the processor by specifying the database connection details, table name, and other properties.
Step 6: Monitor and Manage Dataflow
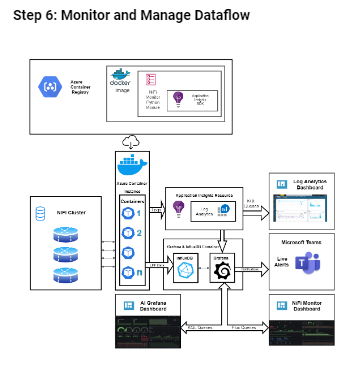
Once the dataflow is set up, NiFi provides a variety of tools to monitor and manage the dataflow. The NiFi UI displays real-time information about the status of each processor, the flow of data through the dataflow, and any errors that occur. NiFi also provides tools to manage the dataflow, such as the ability to start, stop, and pause processors.
Example: Implementing ETL with Apache NiFi
Let’s walk through an example of implementing ETL with Apache NiFi. In this example, we will extract data from a CSV file, transform it into JSON format, and load it into a MongoDB database.
Step 1: Install NiFi
We assume that NiFi is already installed on your system.
Step 2: Create a NiFi Dataflow
To create a new dataflow in NiFi, follow these steps:
- Open a web browser and navigate to the NiFi web UI (by default, it is available at http://localhost:8080/nifi).
- Click on the “Create a new process group” button to create a new process group.
- Give the process group a name, such as “CSV to MongoDB”, and click on the “Create” button.
- Drag and drop the following processors onto the canvas:
- “GetFile”: Used to read data from a CSV file.
- “ConvertRecord”: Used to transform the CSV data into JSON format.
- “PutMongoRecord”: Used to load the transformed data into a MongoDB database.
- Connect the processors by drawing relationships between them. The relationships should be as follows:
- “GetFile” -> “ConvertRecord”
- “ConvertRecord” -> “PutMongoRecord”
- Double-click on the “GetFile” processor and configure it as follows:
- Set the “Directory” property to the path of the directory containing the CSV file.
- Set the “File Filter” property to the name of the CSV file.
- Set the “Polling Interval” property to the desired polling interval (e.g., 1 minute).
- Double-click on the “ConvertRecord” processor and configure it as follows:
- Set the “Record Reader” property to “CSVReader”.
- Set the “Record Writer” property to “JsonRecordSetWriter”.
- Set the “Schema Access Strategy” property to “Inherit Record Schema”.
- Click on the “Advanced” tab and set the “CSV Reader” properties as follows:
- Set the “Schema Text” property to the schema of the CSV file.
- Set the “Delimiter” property to the delimiter used in the CSV file.
- Double-click on the “PutMongoRecord” processor and configure it as follows:
- Set the “Connection String” property to the connection string of the MongoDB database.
- Set the “Collection Name” property to the name of the MongoDB collection.
- Set the “Record Reader” property to “JsonTreeReader”.
- Set the “Write Concern” property to the desired write concern (e.g., “ACKNOWLEDGED”).
Step 3: Extract Data
The “GetFile” processor is used to extract data from a CSV file. In this example, we assume that the CSV file contains information about customers, including their name, address, and phone number. The CSV file looks like this:
/Name,Address,Phone John Smith,123 Main St,555-1234 Jane Doe,456 Oak St,555-5678
Step 4: Transform Data
The “ConvertRecord” processor is used to transform the CSV data into JSON format. In this example, we want to transform the CSV data into the following JSON format:
{ “name”: “John Smith”, “address”: “123 Main St”, “phone”: “555-1234” }, { “name”: “Jane Doe”, “address”: “456 Oak St”, “phone”: “555-5678” }
To configure the “ConvertRecord” processor, we need to specify the input and output formats, and the transformation rules. In this example, we set the input format to “CSVReader” and the output format to “JsonRecordSetWriter”. We also set the schema text and delimiter properties of the “CSVReader” to match the schema and delimiter of the CSV file. Finally, we map the CSV columns to the corresponding JSON fields.
Step 5: Load Data
The “PutMongoRecord” processor is used to load the transformed data into a MongoDB database. In this example, we assume that we have a MongoDB database running on the local machine and we want to load the data into a collection called “customers”.
To configure the “PutMongoRecord” processor, we need to specify the connection string, collection name, and the write concern. In this example, we set the connection string to “mongodb://localhost:27017”, the collection name to “customers”, and the write concern to “ACKNOWLEDGED”.
Step 6: Monitor and Manage Dataflow
Once the dataflow is set up, we can use the NiFi UI to monitor and manage the dataflow. We can view real-time information about the status of each processor, the flow of data through the dataflow, and any errors that occur. We can also start, stop, and pause processors as needed.
Conclusion
Automating ETL processes with Apache NiFi can greatly simplify the process of extracting, transforming, and loading data. NiFi provides a wide range of processors that can be used to handle different types of data sources and destinations. NiFi also provides a variety of tools to monitor and manage the dataflow, making it easy to troubleshoot any issues that arise.
In this blog post, we walked through an example of using NiFi to extract data from a CSV file, transform it into JSON format, and load it into a MongoDB database. We demonstrated how to configure the necessary processors and how to connect them together to create a dataflow. We also showed how to monitor and manage the dataflow using the NiFi UI.
Overall, Apache NiFi is a powerful tool for automating ETL processes, and it is well worth exploring for anyone who needs to work with data on a regular basis.


Add comment