One of the most popular memes associated with software developers is “It works on my machine,” but everyone has experienced this at some point in their software development journey 🙂
We, as developers, work in separate environments such as different operating systems such as Mac and Linux, different code editors, and different OS versions. The nice app that you built might work on your device, but if you ship your code to another machine or server, there is a good chance an error will occur.
Many factors can contribute to the error, including compatibility issues and operating system differences. To avoid these errors, ensure your code works correctly in all target environments before deploying it. But how can we achieve this?
The solution is containerization, and tools like Docker have made it so easy. By using tools like Docker, it’s much easier to keep track of dependencies and make sure teams are working together seamlessly. Learning about Docker and containerization can be very beneficial because they are both widely used in the software development industry.
In this detailed blog, we will discuss everything that you need to know about Docker and help you get started, so let’s start.
What is Containerization?
We’ve all seen sailing ships that provide a standard and portable way of transporting goods between countries, right? Containerization is exactly that process. We ship our code in a standard way, and we can deploy software applications in different computing environments.
Containerization solves issues like:
Dependency management: Containers act like isolated environments in which our application runs flawlessly. By doing this, conflicts and compatibility issues that can arise when several programs are running simultaneously on the same computer are reduced.
Portability: Containers are made to work in different computing environments, such as development, testing, staging, and production. This ensures that an application’s runtime environment is consistent and makes it simple to move between environments.
Scalability: Containers can be easily scaled up or down based on application demand without requiring significant changes to the underlying computing infrastructure.
Resource utilization: Containers are small and don’t use as many resources as traditional virtual machines or bare metal servers.
Productivity: Containers can be used to create development and testing environments that are very similar to production environments. By doing this, developers are able to find and fix problems before apps are released to the public.
Now with containers, we can confidently say to your manager that it works everywhere 😉
What role does Docker play here?
Just think of Docker in this way: computer science is the theoretical part, and software development is the actual implementation of computer science. In the same way, containerization is the idea or the theory, and Docker is actually the implementation.
Docker is an open-source platform that lets you build, deploy, and manage applications that run in containers. It has gained so much popularity in the software development world that it is like a standard now. Although there are other solutions available for containerizing your application, like Podman, LXD, etc.
In order to understand Docker, you actually need to understand three things:
- Containers
- Image
- Registry
Containers: Containers are the wrappers around your application and its dependencies that you can ship, independent of the OS or machine it is running on. It is similar to virtual machines, but it is much simpler and lighter than virtual machines.
Image: An image is a read-only template used to create containers. It is a binary file that has all the parts of an application that are needed to run it, like the application code, dependencies, and the operating system. The Dockerfile tells how the image should be set up. This includes the base image, instructions for installing packages, and how to set up the application.
Registry: A registry is like a warehouse where Docker images are kept so that users can share and distribute them. Docker Hub is the official public registry for Docker images, where you can find thousands of images for many different applications and technologies. You can also host your own private registry to store your custom images securely.
Getting started with Docker
When you’re starting out, it might seem confusing, but working with Docker on your projects will help you understand it. For a clear understanding of Docker, you need to understand how it works and its ecosystem.
The Docker ecosystem is broken down into the following parts:
Docker Engine: The Docker Engine is the central component of the Docker platform. It is in charge of the creation, operation, and management of containers. It includes both the Docker daemon, a server that manages Docker objects such as images, containers, and networks, and the Docker CLI, a command-line interface for working with the Docker daemon. The Docker daemon is a server that manages Docker objects such as images, containers, and networks.
Docker Hub: Docker Hub is the official public registry for Docker images, where you can find thousands of pre-built images for different applications and technologies. Docker Hub also includes tools for building and testing images, as well as collaboration features for sharing images with teams and communities.
Docker Compose: Docker Compose is a tool for defining and running multi-container Docker applications. It uses YAML files to describe an application’s services, like their images, environment variables, ports, and volumes.
Docker Swarm: The Docker Swarm is a native clustering and orchestration tool for Docker. It lets you create and manage a swarm of Docker nodes that can be used to deploy and scale containerized apps across multiple hosts. Swarm has load balancing, service discovery, rolling updates, and fault tolerance, which makes it a good tool for managing containerized applications at scale.
Installing Docker on your machine
Now that you know what Docker is, let’s get started with it. Docker needs to be installed on your computer, which can be done in a few different ways depending on the computer. I’ll be using Windows here, but I’ll walk you through the installation process on other operating systems as well.
Installing Docker on Linux:
On Ubuntu, Docker can be installed using the apt package manager by following the instructions on the Docker website.
First, update your packages:
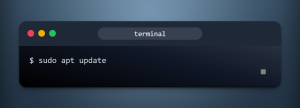
Next, install Docker with apt-get command:
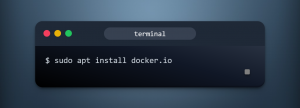
On other Linux distributions, you can install Docker using the package manager specific to your distribution or by downloading and installing the binary directly from the Docker website.
Installing Docker on macOS
For MacOS, all you have to do is go to the Docker website, download the Docker for Mac installer, and follow the instructions.
Check out this link for a detailed guide: Docker for MacOS
Installing Docker on Windows
You can install Docker on Windows by using the Docker Desktop. This is the best and recommended way to install Docker on Windows. Simply download the Docker Desktop installer from the Docker website and follow the instructions.
Once Docker is set up, you can check that it is set up correctly by typing “docker version” into your terminal or command prompt. This should display information about the installed version of Docker and the version of the Docker CLI and Docker API.
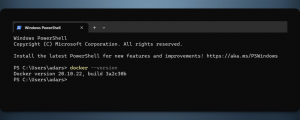
Now that Docker’s installation is complete, let’s start containerizing your application.
How to Containerize your React Application with Docker
I’ll containerize a simple React application here, and you can follow along to learn how to containerize your own. This isn’t framework-specific; you can use whatever framework you want.
This is our main App.js file:
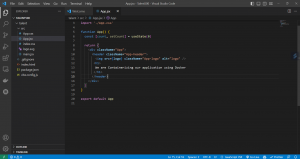
You can follow the below steps to start containerizing
Make a Dockerfile: In the root directory of your React app, make a Dockerfile with the following in it:
# Use an official Node runtime as a parent image
FROM node:14-alpine
# Set the working directory to /app
WORKDIR /app
# Copy the package.json and package-lock.json files to the container
COPY package*.json ./
# Install app dependencies
RUN npm install
# Copy the rest of the application code to the container
COPY . .
# Build the app
RUN npm run build
# Set the command to run the app
CMD [“npm”, “start”]
This Dockerfile uses the official Node.js 14 Alpine image as the base image. It sets the working directory to /app, installs the application’s dependencies, copies the application’s source code, opens port 3000 (which is the default port for React applications), and starts the application with the npm start command.
Build the Docker image: In the same directory as the Dockerfile, you can run the following command to build the Docker image:
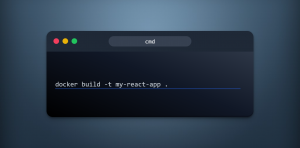
This command creates a new Docker image with the tag “my-image-name.”
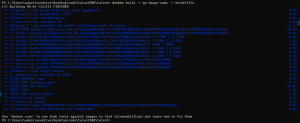
Run the Docker container: Once the Docker image is built, you can run the application in a Docker container using the following command:
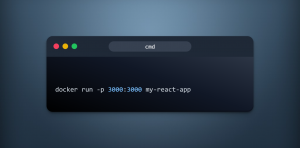
This command starts a new Docker container from the my-react-app image and maps port 3000 from the container to port 3000 on the host machine.
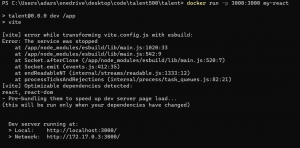
Access the application: Once the Docker container is running, you can use your web browser to get to the React application by going to http://localhost:3000.
Basic Docker commands
Here are some basic Docker commands and concepts related to images, containers, volumes, and networking:
Images
docker images: displays a list of all images that are currently available on your Docker host.
docker pull <image>: Using the docker pull command, you can download an image to your local Docker host directly from a registry.
docker build <path/to/Dockerfile>: builds an image from a Dockerfile located at the specified path.
Containers:
docker run <image>: This command creates and runs a new container from the specified image.
docker ps: This command displays a list of all running containers.
docker stop <container>: The stop command stops a running container.
docker rm <container>: The rm command removes a stopped container.
Volumes:
docker volume ls: This command displays a list of all available volumes on your Docker host.
docker volume create <name>: This command creates a new volume with the specified name.
docker run -v <name>:<path>: This command mounts a volume with the specified name at the specified path in a new container.
docker volume rm <name>: This command removes a volume.
Networking:
docker network ls: This command displays a list of all available networks on your Docker host.
docker network create <name>: This command creates a new network with the specified name.
docker run –network=<name>: This command creates a new container connected to the specified network.
docker network rm <name>: This command removes a network.
Understanding Docker Architecture
Docker is built as a client-server application, with the following components:
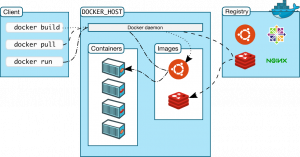
Source: Official Docker Docs
- Docker Client: Developers use the Docker Client, which is a command-line interface (CLI) tool, to talk to the Docker daemon. Using the Docker Remote API, commands are sent to the Docker daemon.
- Docker Daemon: This is the core component of the Docker architecture. It builds, runs, and manages Docker containers. It listens for commands from the Docker client and manages Docker objects such as images, containers, networks, and volumes.
- Docker Registry: This is a repository for Docker images. It stores Docker images, which can be pulled and pushed by users. The Docker Hub is the official Docker registry that stores public Docker images, but there are other public and private registries available as well.
- Docker Objects: These are the components that make up a Docker environment. The main Docker objects are:
- Networks: These are used to allow containers to communicate with each other and with the outside world.
- Volumes: These are used to persist data generated by containers. Volumes can be used to share data between containers.
Docker Architecture Layers
Docker architecture is divided into three layers:
- Application layer: This layer includes the Docker client and the Docker registry.
- Orchestration layer: This layer includes Docker Swarm, Kubernetes, and other orchestration tools that are used to manage multiple Docker containers running on different hosts.
- Infrastructure layer: This layer includes the host operating system and the Docker daemon.
Best Practices for Docker
The best ways to use Docker are to think about security, monitor and log containers, move legacy apps into containers, and work together with Dockerfiles.
Security considerations
- Avoid running containers as the root user to reduce the risk of unauthorized access to the host system.
- Limit container capabilities to only what is necessary to reduce the potential attack surface.
- Use trusted base images from reputable sources to ensure that the image has not been tampered with or contains malicious code.
- Implement strict firewall rules to restrict network access to containers and minimize the risk of network-based attacks.
- Enable SELinux or AppArmor to provide an additional layer of security by limiting the access that containers have to system resources.
Monitoring and logging Docker containers
- Use Docker logs to capture container output
- Integrate with monitoring tools such as Prometheus or Grafana to collect metrics and monitor container performance
- Use centralized logging tools like ELK stack or Fluentd to aggregate container logs
Containerizing legacy applications and migrating to Docker
- Identify the application’s dependencies and configuration requirements
- Create a Docker image that includes all necessary dependencies and configurations
- Test the image thoroughly to ensure that the application runs correctly within the container environment
- Gradually migrate the application to the containerized environment, testing at each stage
Working with Docker in a team
- Use Git or another version control system to manage Dockerfiles and other Docker-related artifacts. This allows for version control and makes it easier to collaborate with other team members.
- Collaborate with team members to create and maintain Docker images. This ensures that the images are up-to-date and contain the necessary components.
- Establish and follow best practices for managing Docker registries and repositories. This includes setting up access controls, scanning for vulnerabilities, and implementing security measures.
- Use Docker Compose or another tool to manage multi-container applications. This simplifies the deployment and management of complex applications by defining and running them in a single file.
Wrapping it up
In this in-depth blog post about Docker, we looked at the world of containerization and how Docker can be used to do it. We’ve talked about a lot of different things, like the structure of Docker, how to install it, basic Docker commands and ideas, best practices for Docker, and how to Dockerize a simple React application.
Now that you have gained a good understanding of Docker and its various components, you can containerize your applications in the most effective and efficient way
Happy containerizing 🙂





Add comment